Have you noticed a lack of efficiency in your marketing campaigns? Email automation is gaining popularity among companies to improve the efficiency of their marketing campaigns. As a result, email automation can improve customer experience and relationship as well as the productivity of the company. This term is increasingly used by marketers, but in practice it is still relatively unknown. According to a study, marketing automation is a challenging process for 61% of companies. In this article, we will explain what email automation is and how it works.
What is email automation?
Email automation (or marketing automation) is the process of sending emails automatically. This enables targeted emails to be sent based on user actions or user behaviours on a website. If the user meets all the predefined conditions, he will receive an email. For example, if your user subscribes to your newsletter, you can send them an automatic welcome email.
Email automation can therefore be very useful to :
- Notify a user of a change in their account,
- Wish a birthday,
- Send welcome or unsubscription emails,
- Notify a user of a change in the status of a WooCommerce order,
- Send a shopping cart reminder…
What are the advantages of email automation?
The advantages of email automation are not only about sending emails automatically. It also has significant advantages for a company.
Email automation allows you to :
-
Build customer loyalty
Email automation is a very effective technique for maintaining a good relationship with your prospects. You can quickly engage new customers by interacting with them from their first action, and also retain your old customers. Depending on their behaviour on your site, you can regularly propose targeted offers and promotions.
-
Save time
Email automation emails saves time on marketing campaigns. Consider sending welcome emails or reminders about shopping carts to each user. After a while, this task becomes tiresome and repetitive. You lose precious time. Automating your emails can increase your efficiency.
-
Personalize your users’ experience
These automated emails are targeted according to your users’ behaviour, making the user experience highly personalized. You can also incorporate elements of personalization based on the context of your emails.
For example:
- Your user’s first name, “Welcome, John”
- A birthday “Today is 08-09-2021. Happy Birthday! “
- A change in order status “Your order “6754” has just been shipped”
These automatic emails are sent at the right time and are therefore opened and clicked on more frequently. They generate more visits and sales.
How does email automation work on WordPress?
There are many automation tools available today. On WordPress, you can send your automated campaigns using a newsletter plugin. To understand how marketing automation works, let’s take the example of automated emails from AcyMailing, a newsletter plugin. If you want to know more about email creation, please read our article : How to use our WordPress newsletter plugin?
The first step to automate your emails is to set up a scenario. It looks like this:
Step 1: Choose an entry point
First, you will choose the entry point of your scenario. This entry point will determine the triggering condition of your email.
An entry point can be the registration of a user to a contact form, the addition of a product to a cart, or the creation of a user account.
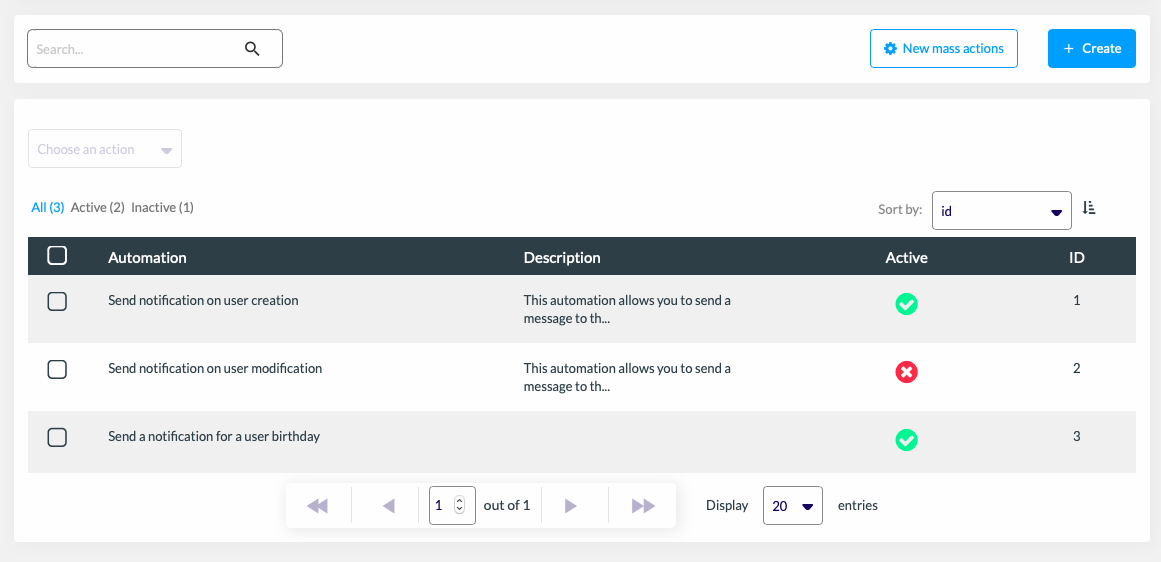
In AcyMailing, to access the entry point go to the “Automation” section. You will get a list of possible automations.
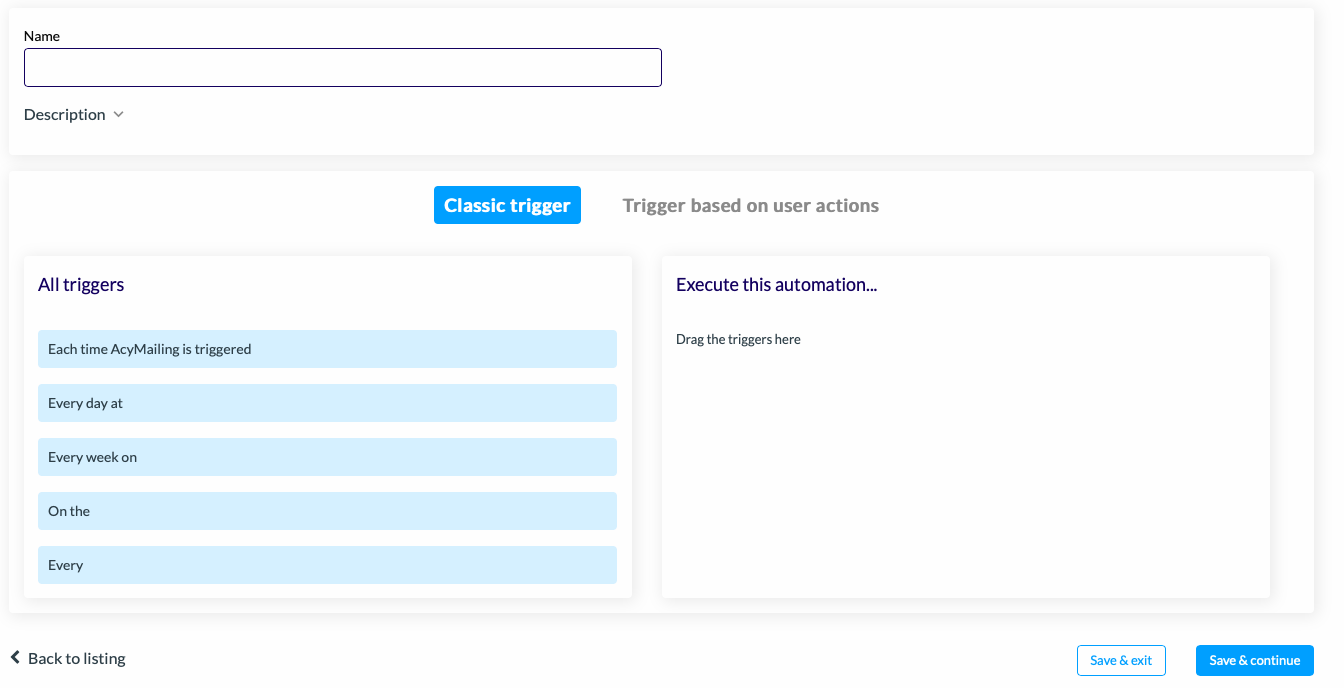
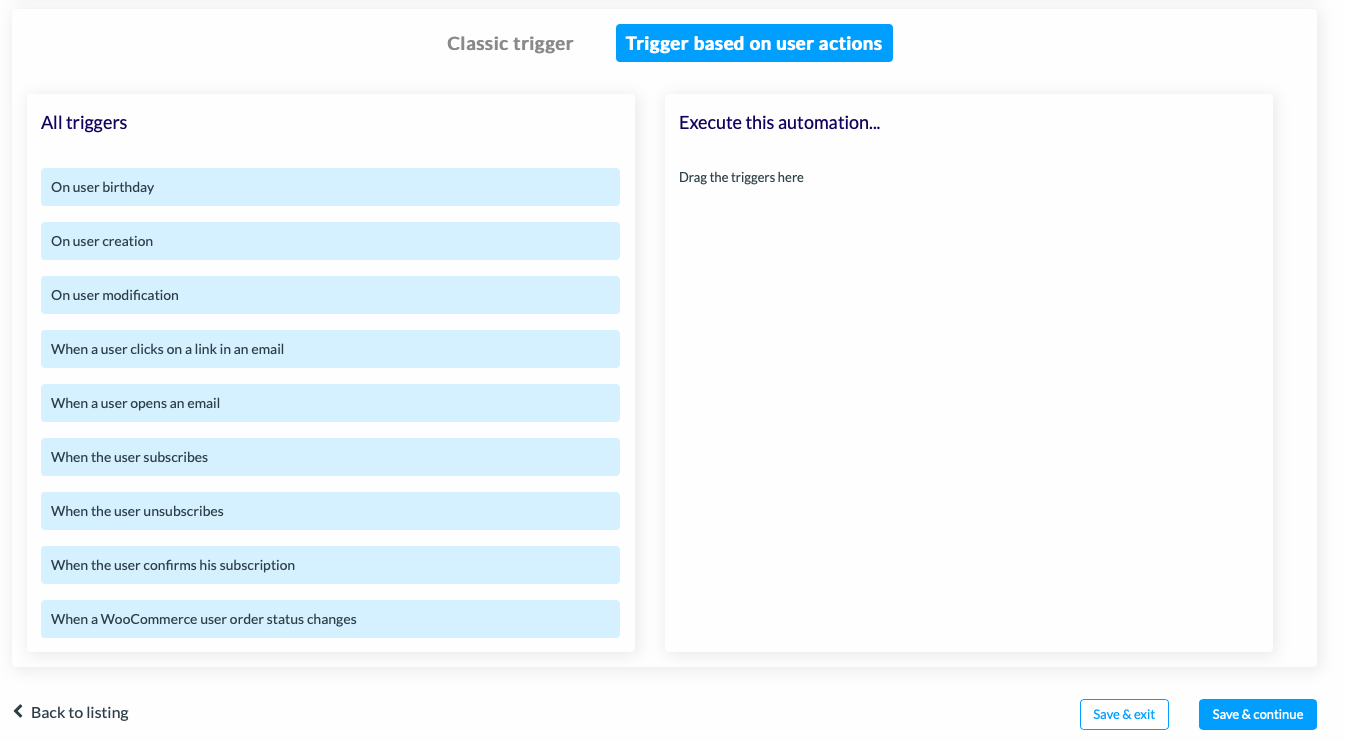
It is thus possible to trigger your actions according to two types of automation:
- Mass actions: these are one or more actions that you can trigger directly on certain specific targets. For example: every time, every day at a specific time, every week…
Actions linked to a specific target (or automation): these automations are mass actions triggered automatically on specific targets. For example: a birthday, the creation/modification of a user account, a click on a link, the change of a WooCommerce order status…
Step 2: Determine the conditions
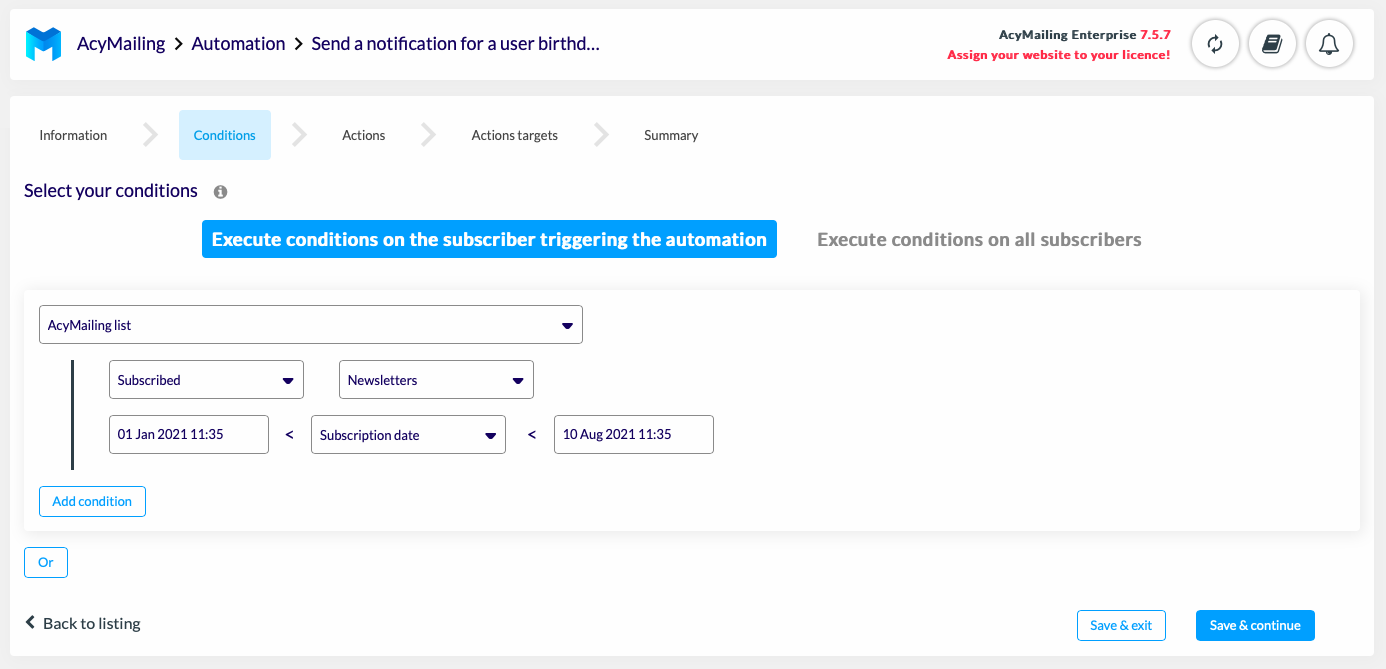
Then, you will have to choose the conditions under which the automation will apply. All conditions must be met for an automation to be executed properly.
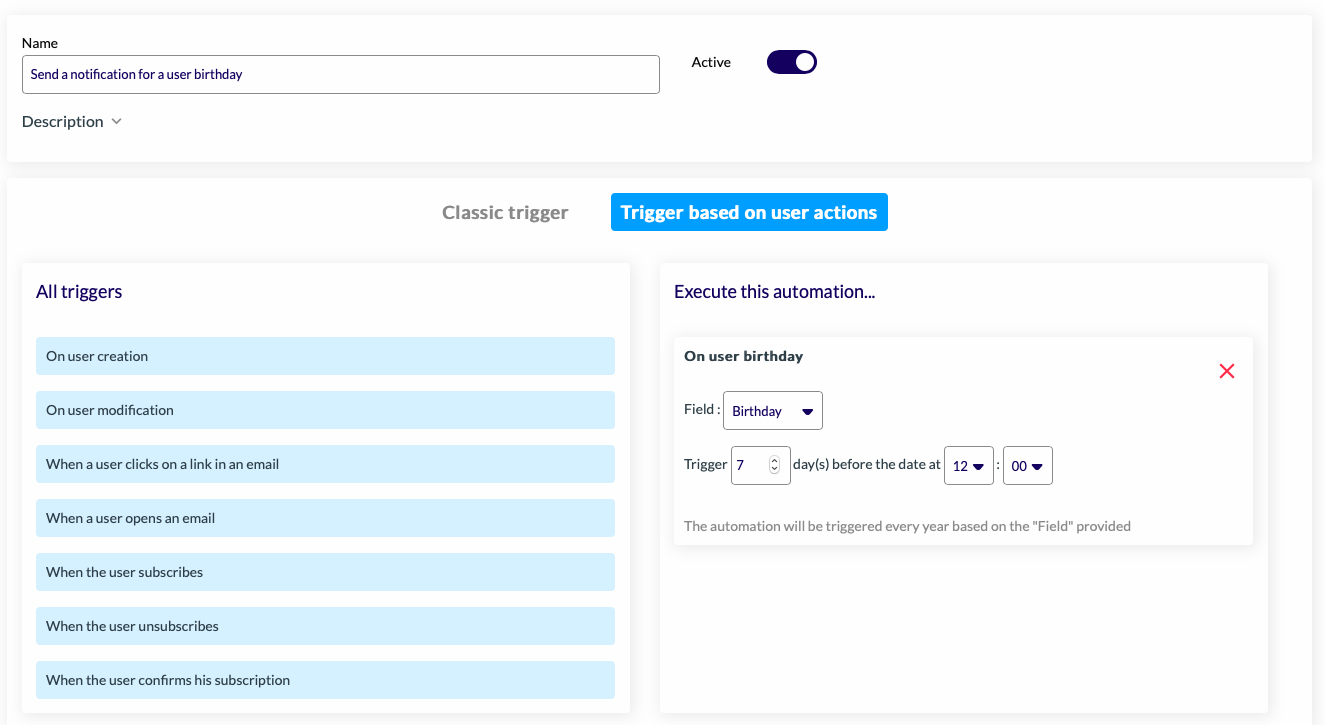
For example, if you send automatic birthday emails to all your users. The scenario would be as follows:
Choose the field “Birthday” and determine when the action will be triggered: “Trigger this email 7 days before the date at 12:00”.
You can also define in the conditions :
- The target: “AcyMailing list”
- The action performed: “who subscribed to the newsletter”
- From when: “from 1 January 2021 to 10 August 2021”
AcyMailing users who have subscribed to the newsletter between 1 January and 10 August 2021 will receive an automatic birthday email.
This step can change depending on the triggers you have previously defined.
If you choose a classic trigger, you can run the condition only on all AcyMailing users, whereas if you chose a user action based trigger, you can run the condition on the user who triggers the automation or on all users.
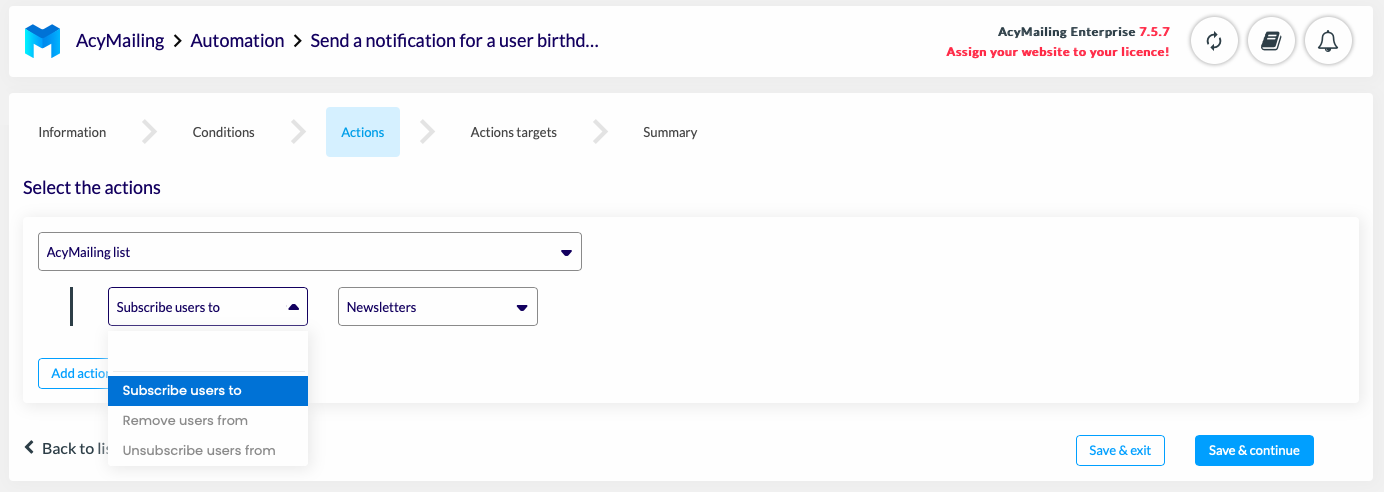
Step 3: Choose actions
The “Actions” step allows you to perform actions on your users. You can subscribe, unsubscribe or remove the user from the list you want. In this example, we are going to subscribe the users of the AcyMailing list to the “Newsletter” list.
Step 4: Choose the target of the actions
This step allows you to choose on whom the actions will be applied. If you have chosen a classic trigger, you can execute actions on all users or only on a part of them, depending on your filters. If you have chosen a trigger based on a user action, you will be able to execute actions on all users and only on the one who has triggered the automation.
Step 5: Activate and send your email automation
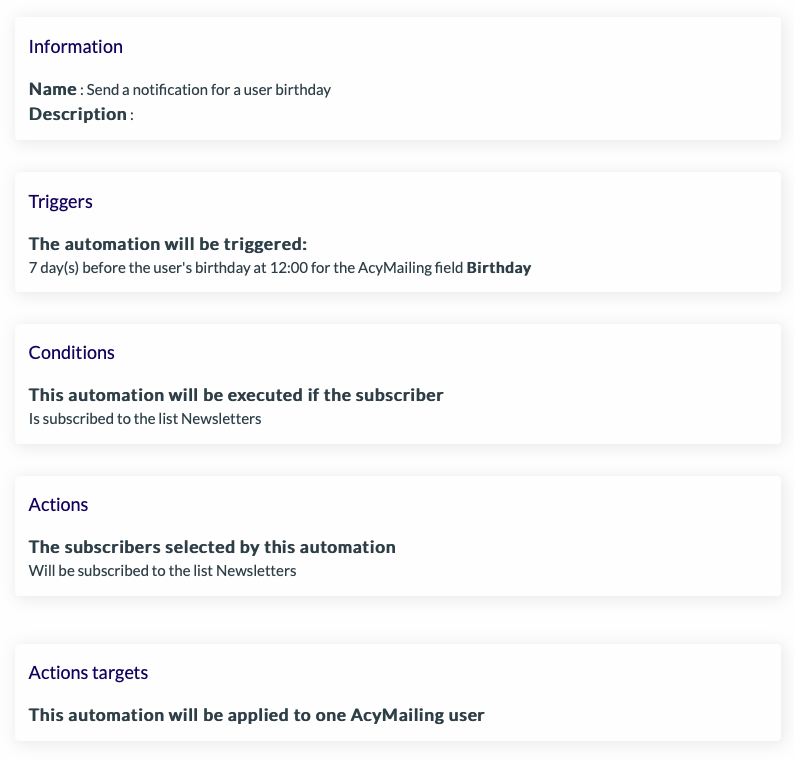
By the end of the process, you will have a summary of your scenario, which summarizes the previous steps.
If you are satisfied with your scenario, you can activate the automation and save and exit.
You can then proceed to the creation and sending of the email.
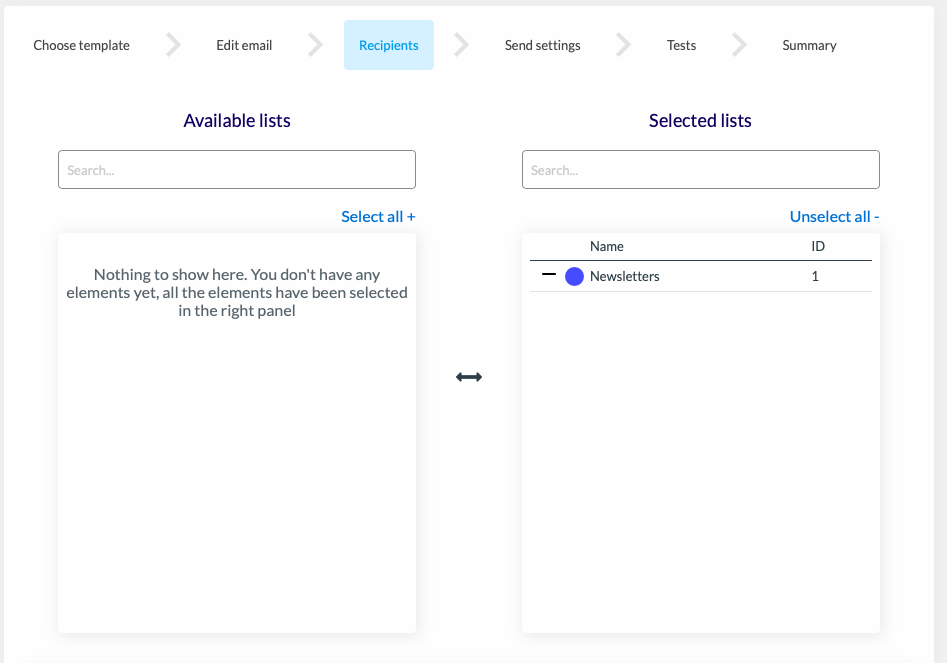
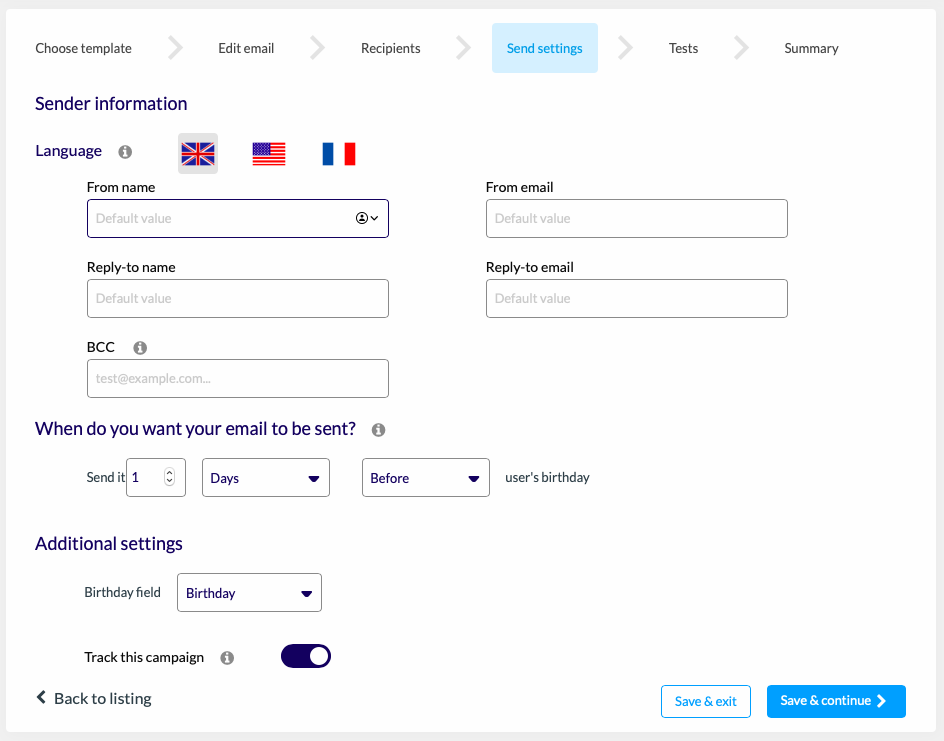
To send your email on AcyMailing, go to the “Emails” section. Create a new email by selecting “Birthday emails” or choose one from the templates.
As soon as you create your email, you can define the recipient list and the date you want the email to be sent.
Finally, you can define either a dynamic date (2 hours after the trigger, for example) or a precise date in the “Recipient information”.
All you have to do is validate the sending of your campaign and that’s it.
Now you know everything about email automation.

