Are you familiar with popups on the web? These pop up windows that appear during your navigation are often invasive and not well used. They harm your users’ experience. But when used properly, they can be very useful to brands and companies by helping them to get new customers. Indeed, a popup allows high conversion rates ranging from 3.1% to 9.3% on average (SuMoMe).
In this article we will see how to create popups on WordPress.
What is a popup?
A popup is a window that is automatically displayed on your website. It is used to inform the customer about an offer (promotion, new product/service), to encourage him/her to fill in a subscription form (newsletter, white paper) or to answer a survey. Its purpose is to encourage the user to perform an action on your website.
Popups have several advantages. Firstly, a popup cannot be ignored by website visitors. When a popup is displayed, it hides the content of the page or a part of it.
The visitor will therefore necessarily see the message displayed on his screen, even if he wants to leave the popup. Secondly, it allows a brand’s message to be delivered. It will therefore promote its content (promotion, white paper, events) and therefore create added value. Finally, a popup is fully customisable. You can create popups that make a lasting impression thanks to its design, but also adapt its content to your marketing strategy.
In this article, we’ll focus on two types of popups:
- Subscription popup
- Exit-intent popup
The subscription popup is a window that can be displayed at any time during a user’s visit, whereas the exit popup is displayed when the user wants to leave a site. These two popups therefore have two very distinct purposes. We will therefore see the characteristics of each of them.
The subscription popup
A subscription popup is a subscription form that appears on your website and encourages the user to sign up for a newsletter, a loyalty program or a white paper. On WordPress, there are different ways to generate a signup form on your website:
- The default WordPress form
This method allows you to integrate your registration form quickly and easily. This default tool is very limited and does not allow you to customise your forms.
- A plugin or an extension
You can design your forms using a plugin or extension on WordPress. Plugins are often full-featured tools that have many features and allow for a wide range of customisation.
- Coding your registration form
It is possible to design your registration forms by creating your own code. However, this option requires the use of developers to create it. Your forms will be unique and therefore very customised.
All these solutions allow you to create forms on your website, but to create a subscription popup the easiest way is to use a plugin. We will see how to create a popup registration form on your website using the plugin, AcyMailing.
Create a subscription popup with AcyMailing
AcyMailing is a plugin that allows you to create, manage and send your newsletters on WordPress. Before thinking about creating your newsletter, you need to create a subscription form to subscribe and get new subscribers. Popup subscription form is only included into our Enterprise version.
STEP 1: Install AcyMailing
To install AcyMailing, simply download your Enterprise version from our website then go to your “Plugin” area in the WordPress left menu and click on “Add a plugin”. Use the button to upload the ZIP and you’re done.
STEP 2: Create a subscription popup on AcyMailing
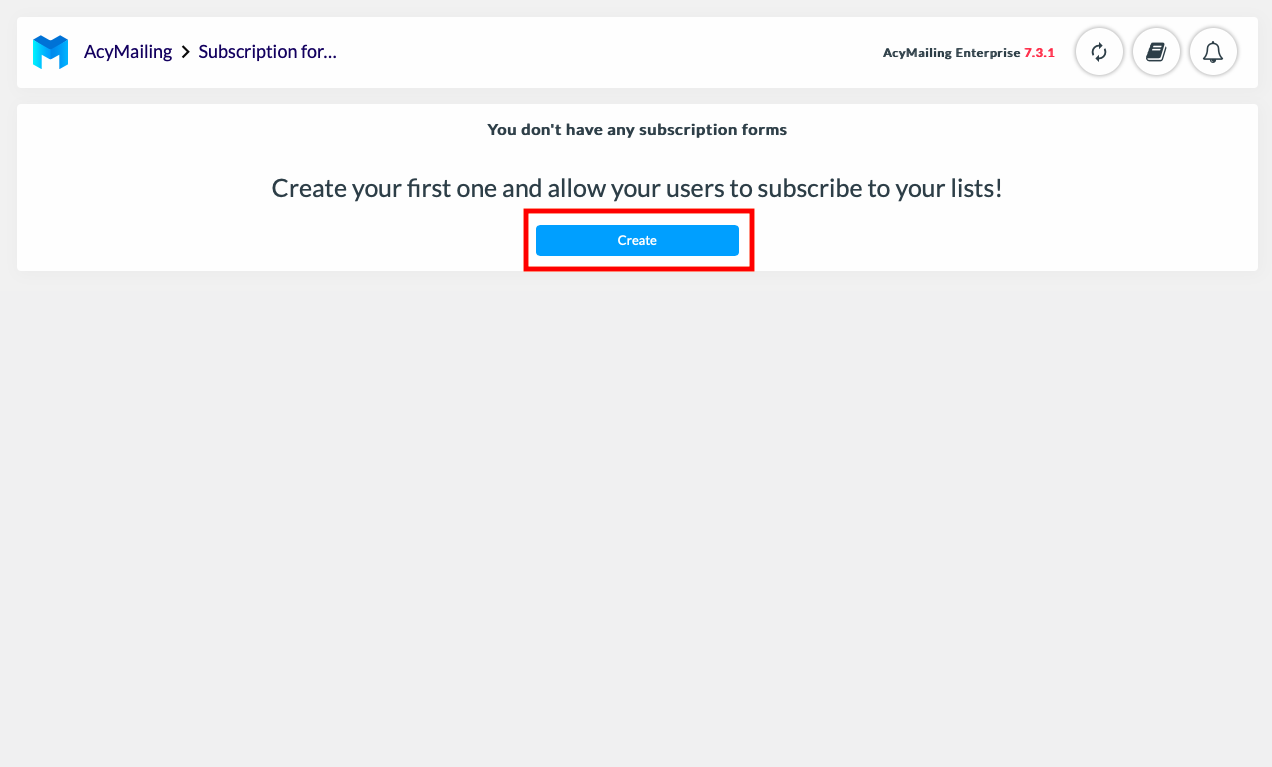
Creating a subscription popup on AcyMailing is very simple. To create a registration form, go to the “Subscription form” section in the WordPress menu and click on “Create”.
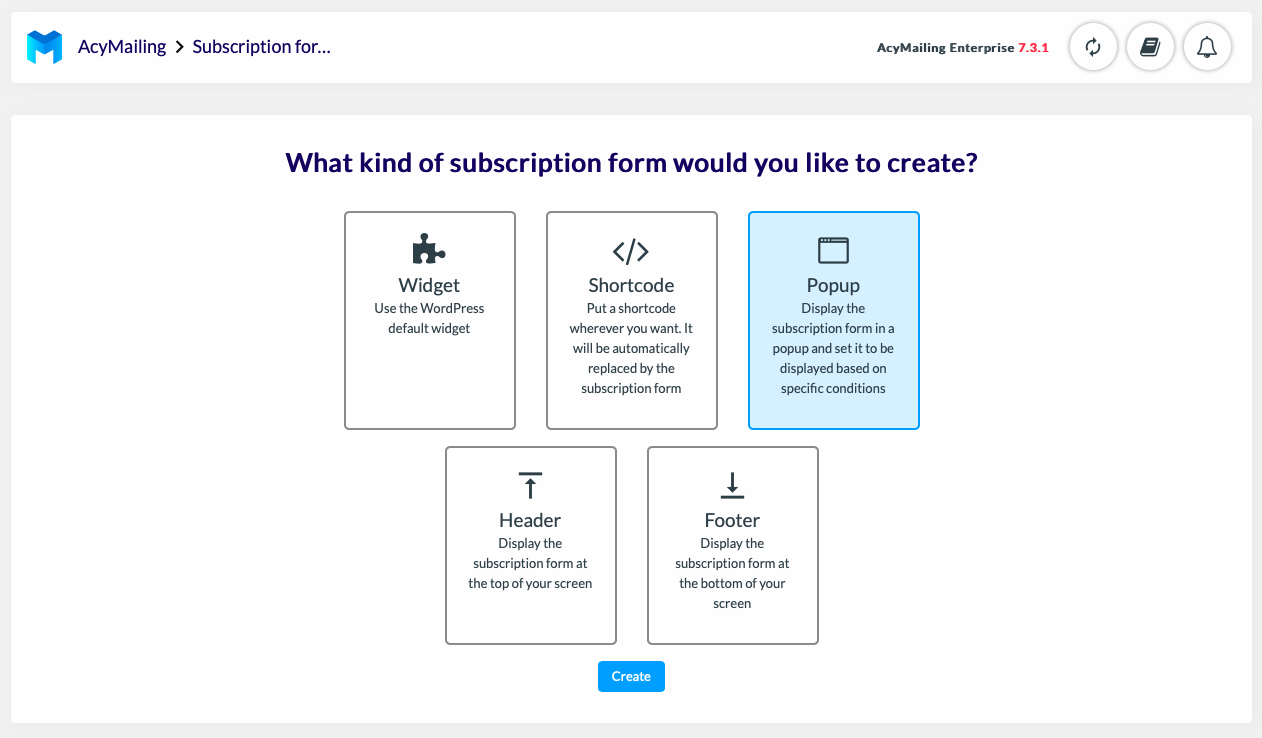
The page below will appear. You will be able to choose to create different types of subscription forms. To create a popup, select “Popup”.
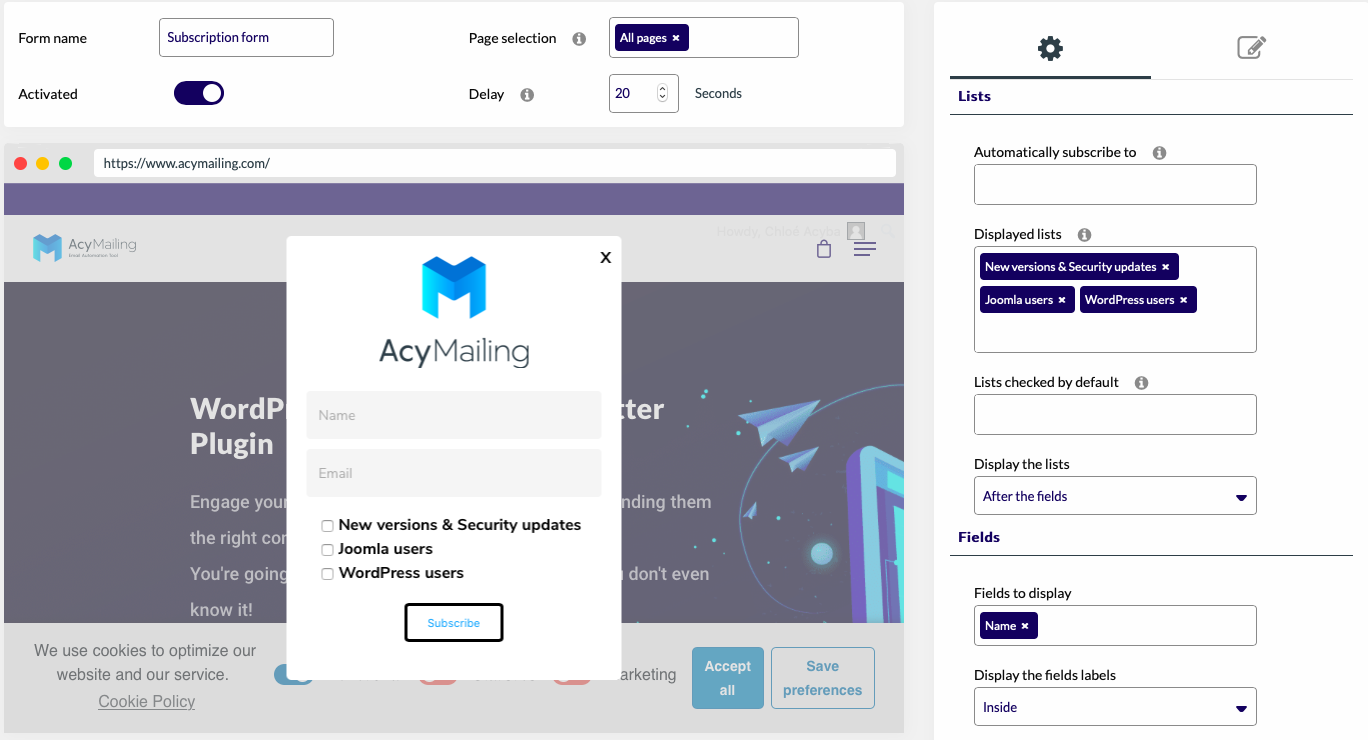
You are now in the editor of your subscription form.
You will be able to design your popup from A to Z. Start by editing the content.
The editor will give you a preview of your future pop-up while it is being edited. It is possible to freely customise your popup. For example, you can:
- Select the pages where the pop up appears
- Choose how long it will appear
- Choose its display mode
- Add a logo
- Display lists and custom fields
- Customise the button…
As you can see, the editor allows you a wide range of possibilities. You now know how to create a popup newsletter subscription with AcyMailing.
If you want to send newsletters with AcyMailing, here is a complete guide to everything you need to know about creating and sending newsletters with AcyMailing.
The exit-intent popup
An exit-intent pop-up is a window that opens before your user leaves the website. It’s a last intention popup. 70% of internet users abandon their shopping cart online. It can therefore be very useful on ecommerce websites to encourage the customer to complete their shopping cart. The exit intent popup detects when the visitor is about to leave the browser window.
There are several plugins that allow you to send out exit intent popups:
- Popup maker
Popup maker allows you to create pop-ups on your website. This plugin offers many features, you will be able to create very good exit intent popups. This plugin is versatile and flexible and allows you to create all types of popups: email opt-in, leads, e-commerce, contact form…
- Popup builder
Pop up builder is a very simple tool to use. It will be easy for you to insert your opt-in pop-ups from your website. The forms are 100% customizable. This plugin integrates perfectly with many plugins: Polylang, WooCommerce, Contact Form 7 etc.
- OptinMonster
OptinMonster is a plugin that allows you to generate popups on WordPress and acquire subscribers, increase your sales and develop brand activity. The plugin has many features: customization of these pop-ups, multiple trigger action, drag and drop editor, templates…
We’ll now see how to create an exit-intent popup on WordPress with the OptinMonster plugin (paid feature).
STEP 1: Install OptinMonster
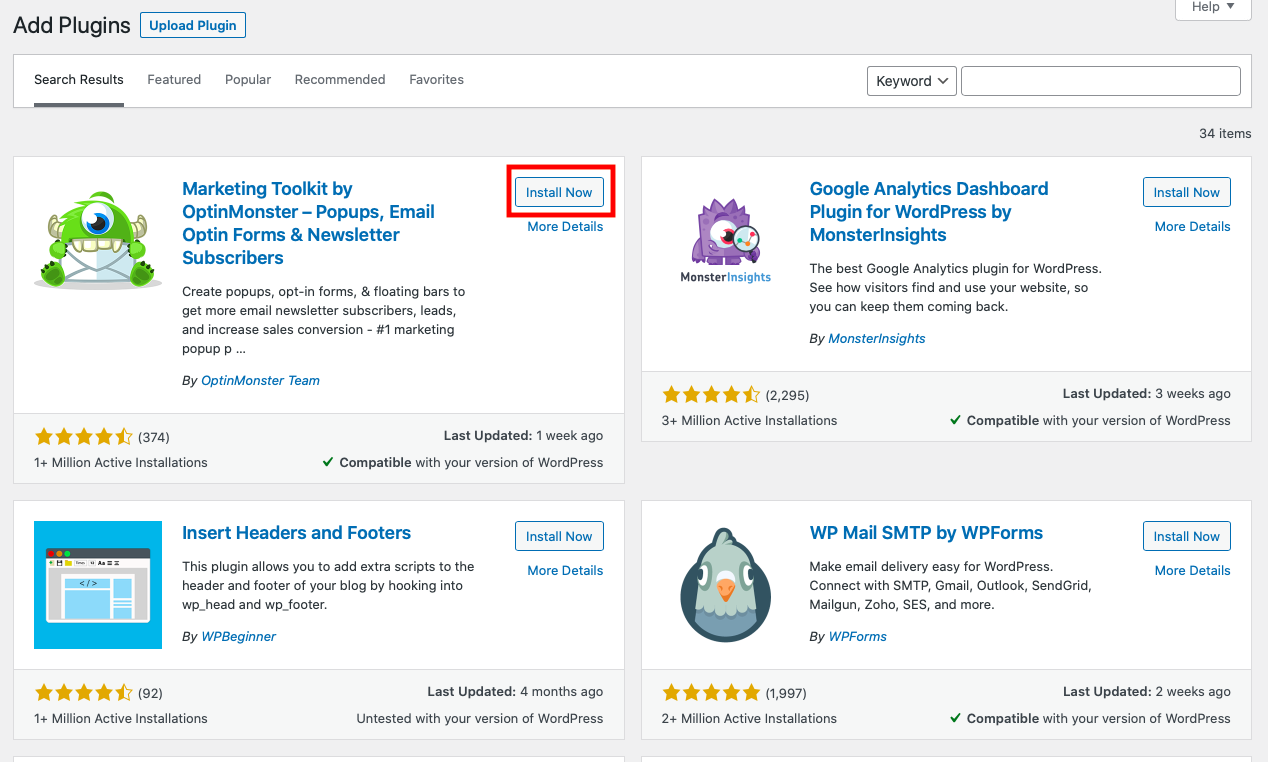
First, you will install OptinMonster. To install it, simply go to “Plugin”, click on “Add a new plugin”. Search for the plugin in your search bar and install it then activate it.
After this step, you’ll need to create an account. You will have to fill in your objectives, your personal information and your bank details (in case of a problem). The plugin is free of charge, no charges will be applied but some features such as the exit intention popup are not free (from 30$).
As soon as this step is completed, you will receive a confirmation email. All you have to do is connect your website to OptinMonster and start creating your first popups.
STEP 2: Create an exit-intent popup on OptinMonster
To create a popup for an exit-intent popup, go to “Campaign”. You will be able to create your first popup, click on “Create” and name it.
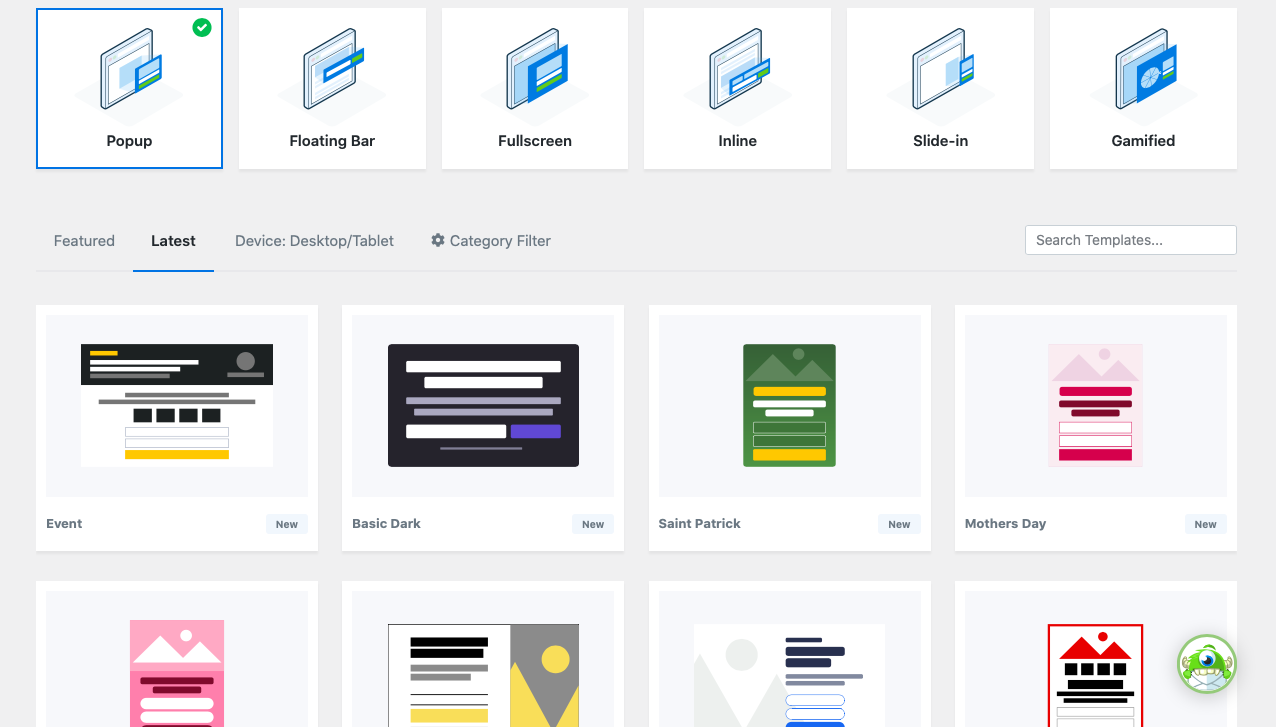
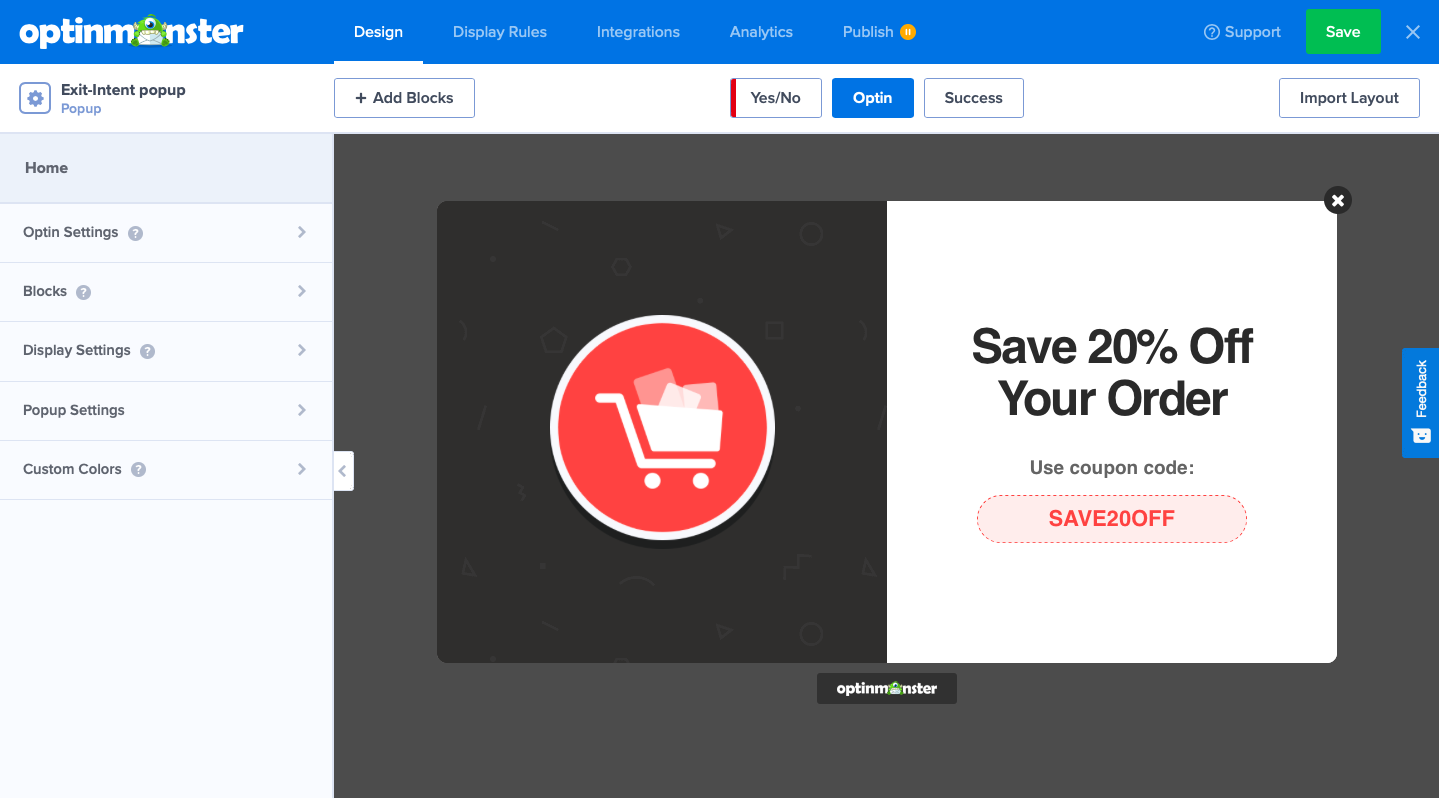
Optinmonster will offer you several types of message display: popup, floating bar, full screen… Select the pop-up mode. You can either start from a template or from scratch. The choice is yours. For this example, we will start from the template “Abandoned shopping cart”. Name your new popup.
You will be able to customise the design of your popup. In the editor mode, you can modify your popup as you wish. The plugin gives you a wide choice of customization: you can change the colours, the fonts, the display modes, the button display…
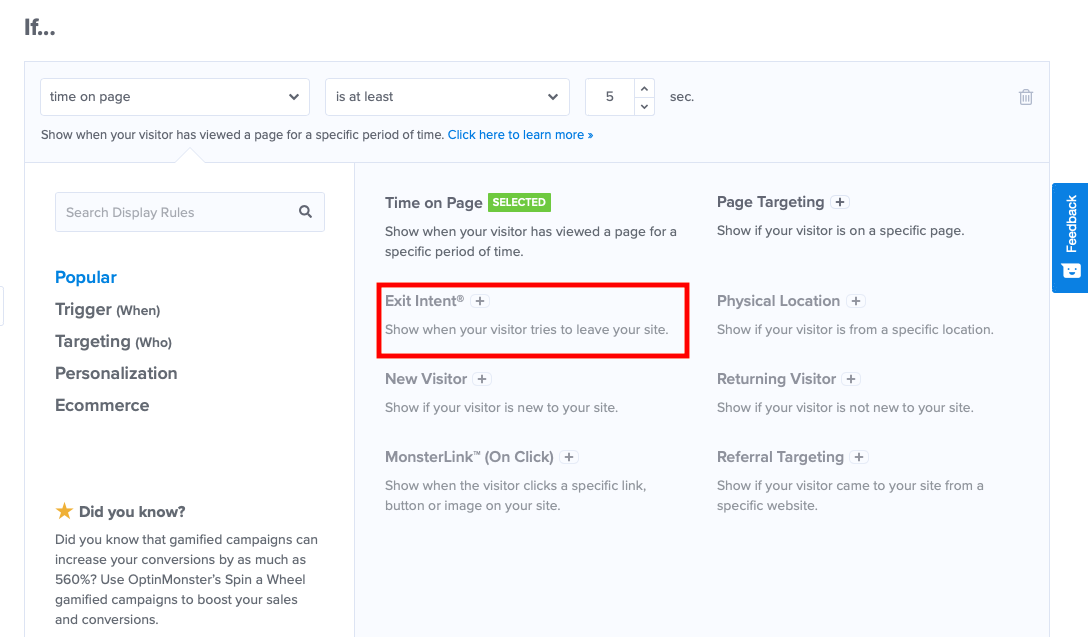
Once you have customised your popup, go to “Display rules”. You will be able to determine when your pop-up will be displayed. If you want the popup to appear before your visitor leaves the site without completing their shopping cart, select “Exit-Intent”.
This action will allow you to trigger the popup before your visitor leaves the site. It will allow you to increase the conversions on your site and encourage visitors to complete their shopping cart thanks to a discount for example. You can then add integrations and finally publish your popup. Finally, you can analyse the results of your campaign using statistics.
If you want more examples of popups, this article lists the best intention pop-ups of 2021.
Now you know everything about how to create subscription popup and exit-intent popup on WordPress.

