Every year, billions of emails are sent around the world. In 2020, 319 billion emails were sent and more than 3.9 users were registered (Statista). Marketing emails are widely used in the communication strategies of companies. Indeed, the newsletters allow to inform, to create loyalty and to create a link with its customers. They allow you to get more traffic on your website but also to get new customers. It would be a waste to ignore this strategy, but to do so, let’s start by creating a newsletter.
In this article, we will see how to create a newsletter on one of the most used CMS in the world, WordPress.
How do newsletters work on WordPress?
Before you think about how to create a newsletter, you need to think about how to send it. Emails sent from WordPress are mainly transactional emails. In other words, welcome emails, order forms, password changes etc.
To send your newsletters, you need to use an email solution that will integrate with WordPress. This solution can be an online email service (Mailchimp) or a newsletter plugin integrated to your CMS (AcyMailing). It will allow you to create, plan and send your newsletters. You can then create a subscription form (opt-in) to get new subscribers. Your visitors will be able to subscribe and receive your newsletter.
The easiest way to create a newsletter is to have a service built right into WordPress. We will see how to create a newsletter from WordPress using a newsletter plugin, AcyMailing.
How to create a newsletter on WordPress with AcyMailing?
AcyMailing is a newsletter plugin for WordPress. This plugin allows you to create, manage and send your newsletters. We will discover its main features as we go along in this article. Let’s proceed step by step. First of all, you have to install and set your AcyMailing plugin.
STEP 1: Install AcyMailing
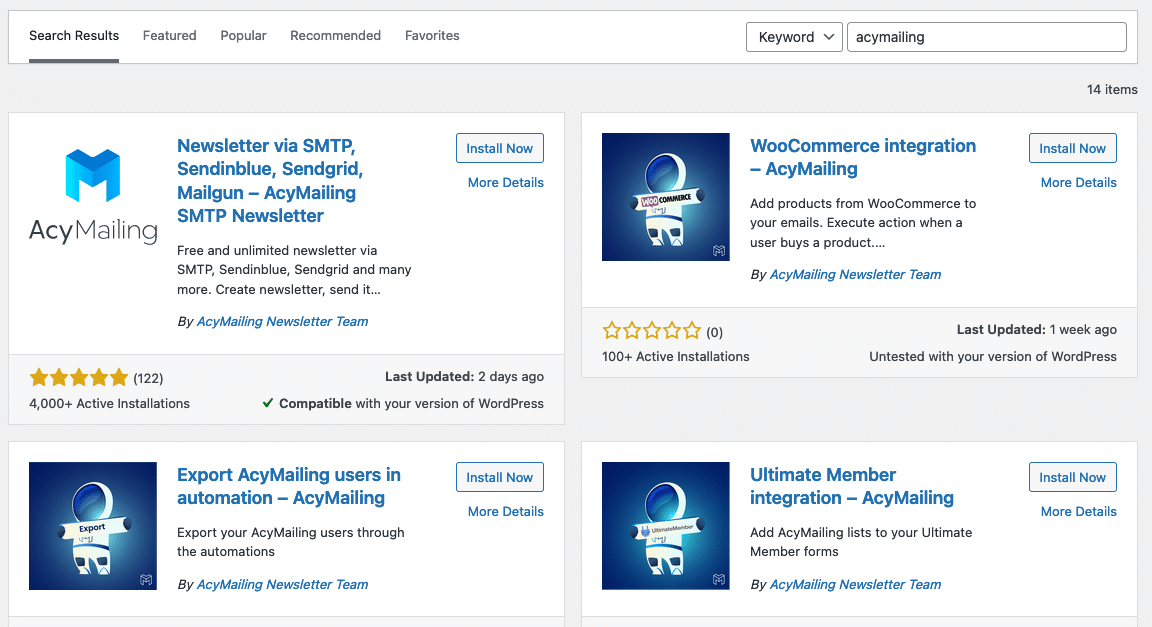
AcyMailing is really simple to install. To install AcyMailing, you need to login to your website’s WordPress account. In the “Plugin” section, click on “Add a plugin”. Search for “AcyMailing” in your search bar, download it and activate it.
STEP 2: Configure AcyMailing
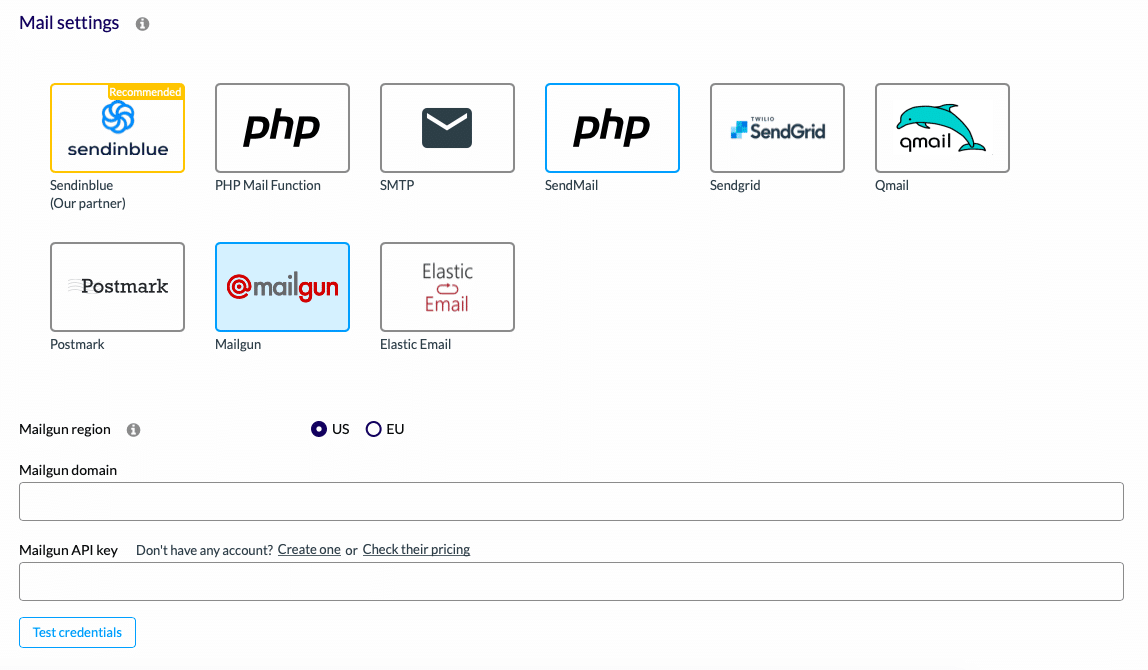
Once the plugin is installed, you can configure your sending methods in “Configuration”. The default method is SMTP. Unfortunately, this method doesn’t allow an optimal deliverability of your emails. Your emails may end up in SPAM. That’s why it is more interesting to use an external delivery method.
If you already have an external delivery service, you only need to fill in the data for this service. Usually, the following elements are requested:
- API key
- The domain name
- The surname used and your password
The information requested may be different depending on the service.
On AcyMailing, it is possible to use different sending methods from classic SMTP to services such as Amazon SES, Sendinblue, Mailgun or SendGrid.
If you don’t have an account on an external server yet, you just have to choose the one you want, create an account and follow the installation/configuration procedure.
Several articles are available to help you set up these services:
STEP 3: Manage your contact list
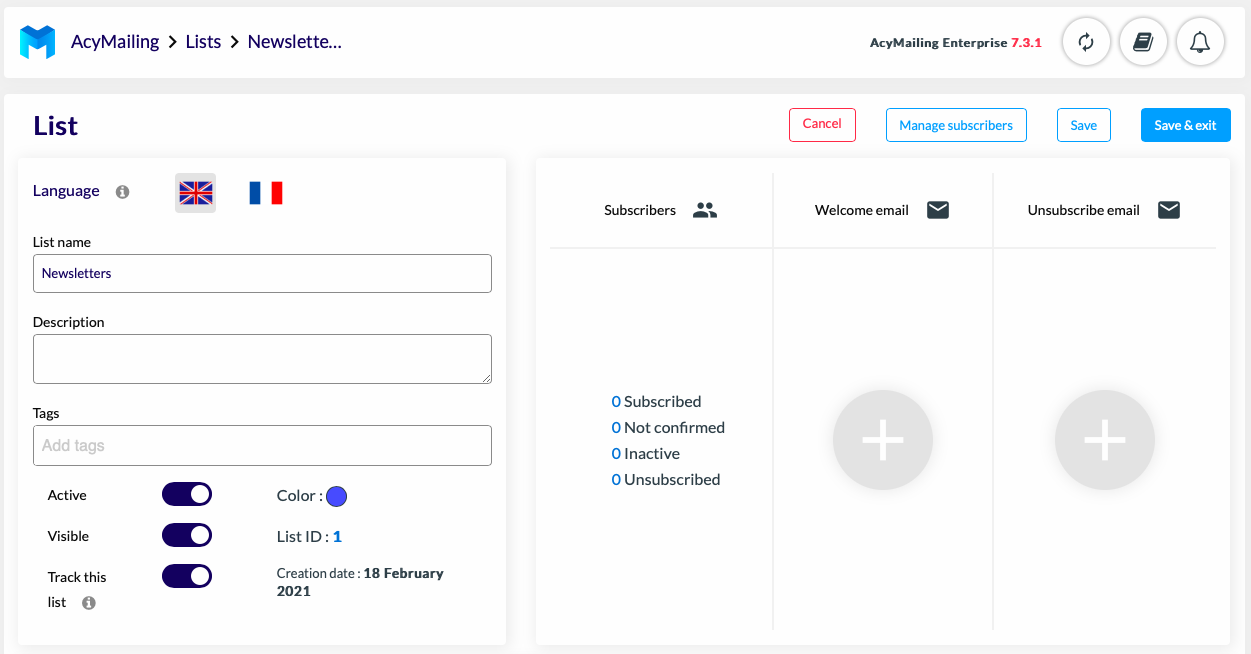
Your plugin is now well configured. In order for your subscribers to register on your site, you must first create a list. Your subscribers will be able to subscribe to this list. For example, if a subscriber subscribes to the “Newsletter” list, he will receive all the emails from this list. This allows you to segment your emails according to your customers’ needs.
To manage your contact list, go to the menu and click on “List”. Create a “Newsletter” list. You can determine a language for this list, add a description or subscribers. You can add contacts who will receive a welcome email or those who no longer wish to receive one (unsubscribe email).
Once set up, you can save your list.
STEP 4: Create a subscription form
You can finally create your subscription form. This form allows you to acquire subscribers and grow your list of subscribers.
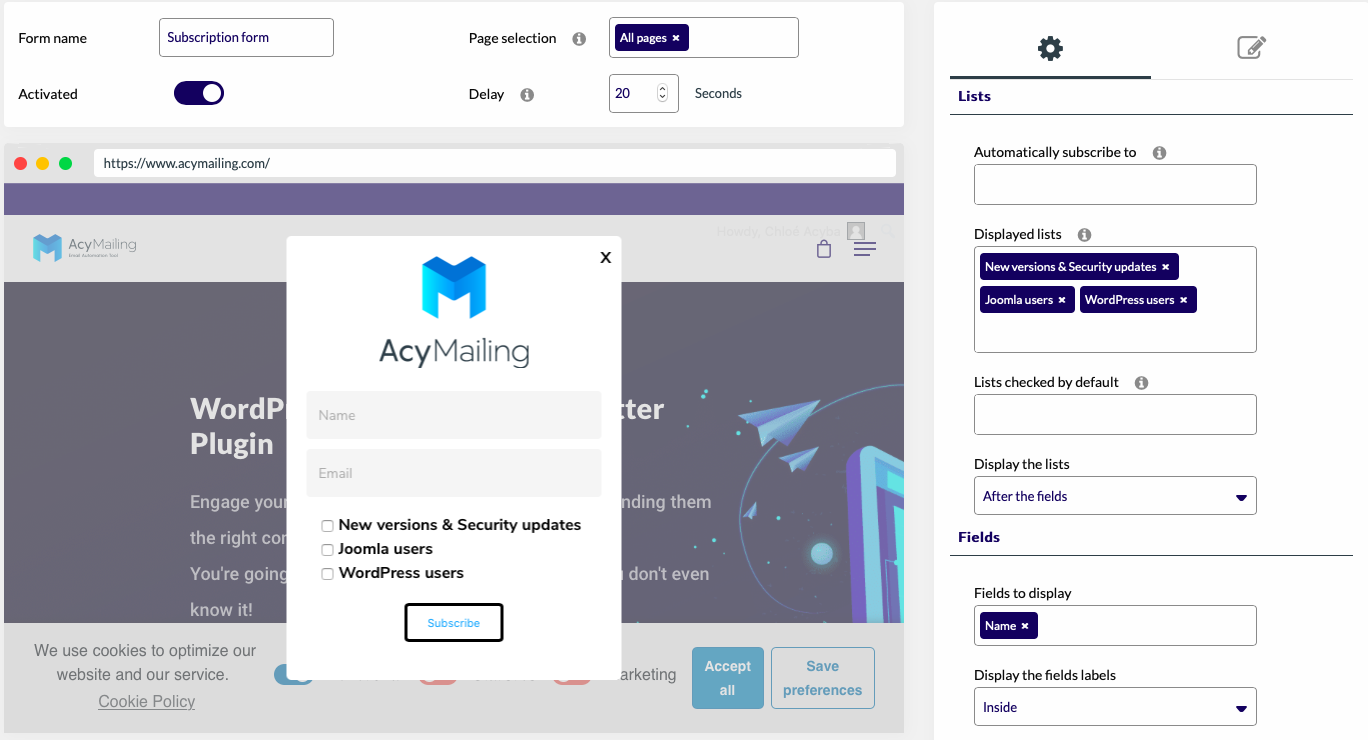
To create one, go to “Subscription form” in the AcyMailing menu and create a new form. You can choose between several widgets: default, shortcode, pop up, top or bottom of page. Select the one you want.
You can now edit its content and customise its appearance: add a logo, a “Sign up” button, display lists and custom fields… The editor gives you a preview of your future website with your form.
STEP 5: Create a newsletter on WordPress with AcyMailing
You have now your subscribers and your plugin installed. All you have to do is create your first newsletter.
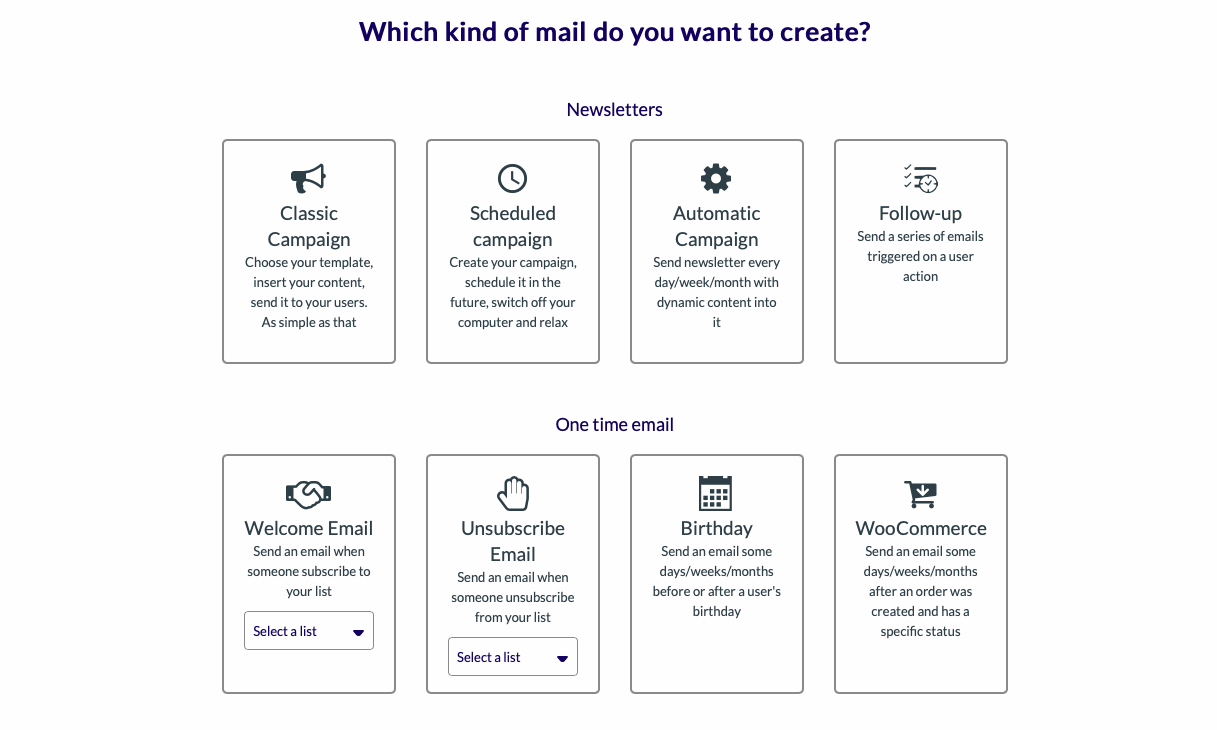
To create your newsletter, go to your WordPress left menu and click on AcyMailing then “Emails” and “Create”.
You have the choice between different types of newsletters: classic, scheduled, automatic, followed… Choose the one that best suits your needs. For the first time, you can choose the classic newsletter. Click on “Create”.
You can now edit its content and customise its appearance: add a logo, a “Sign up” button, display lists and custom fields… The editor gives you a preview of your future website with your form.
You will be asked to use a template. If you already have templates, you can import them or create new ones from the “Templates” section of your WordPress menu. If you don’t want to use one, you can stay in “Emails” and create your newsletter from scratch (“Start from an empty template”).
You can create your newsletter in several steps:
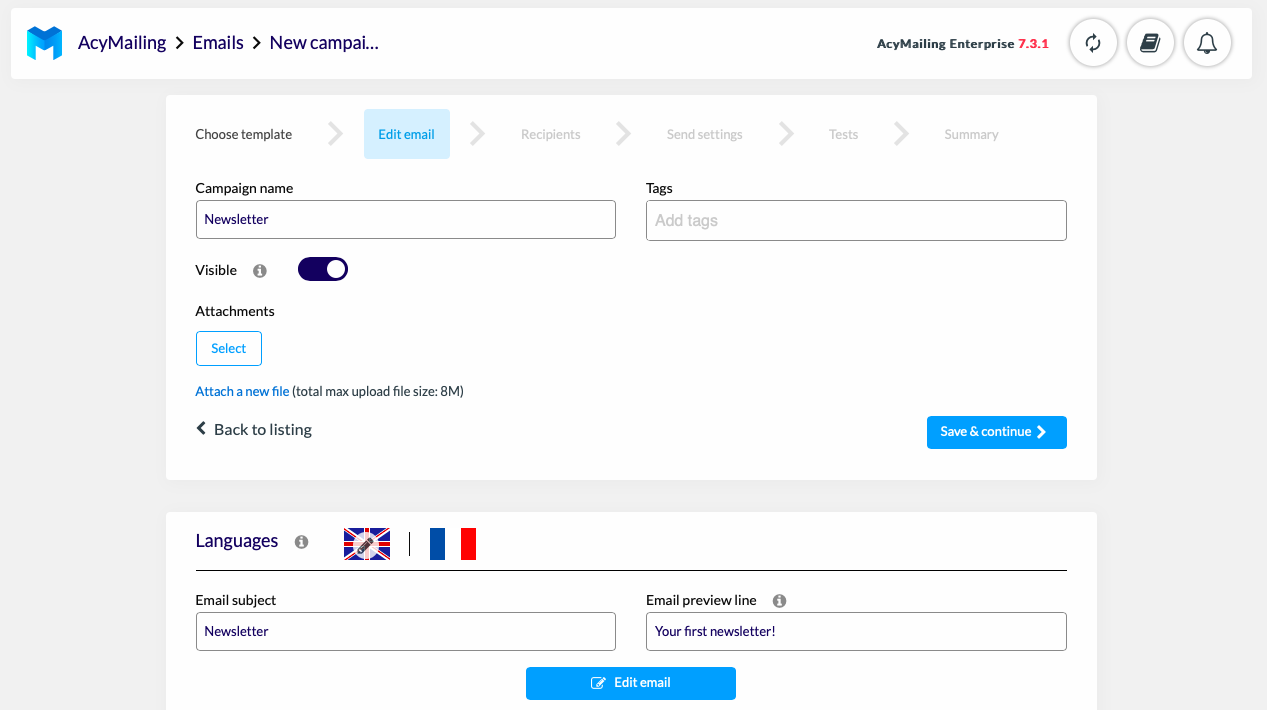
1. Edit your newsletter information
Fill in your campaign information: name, email subject and email preview line.
2. Edit and create your newsletter
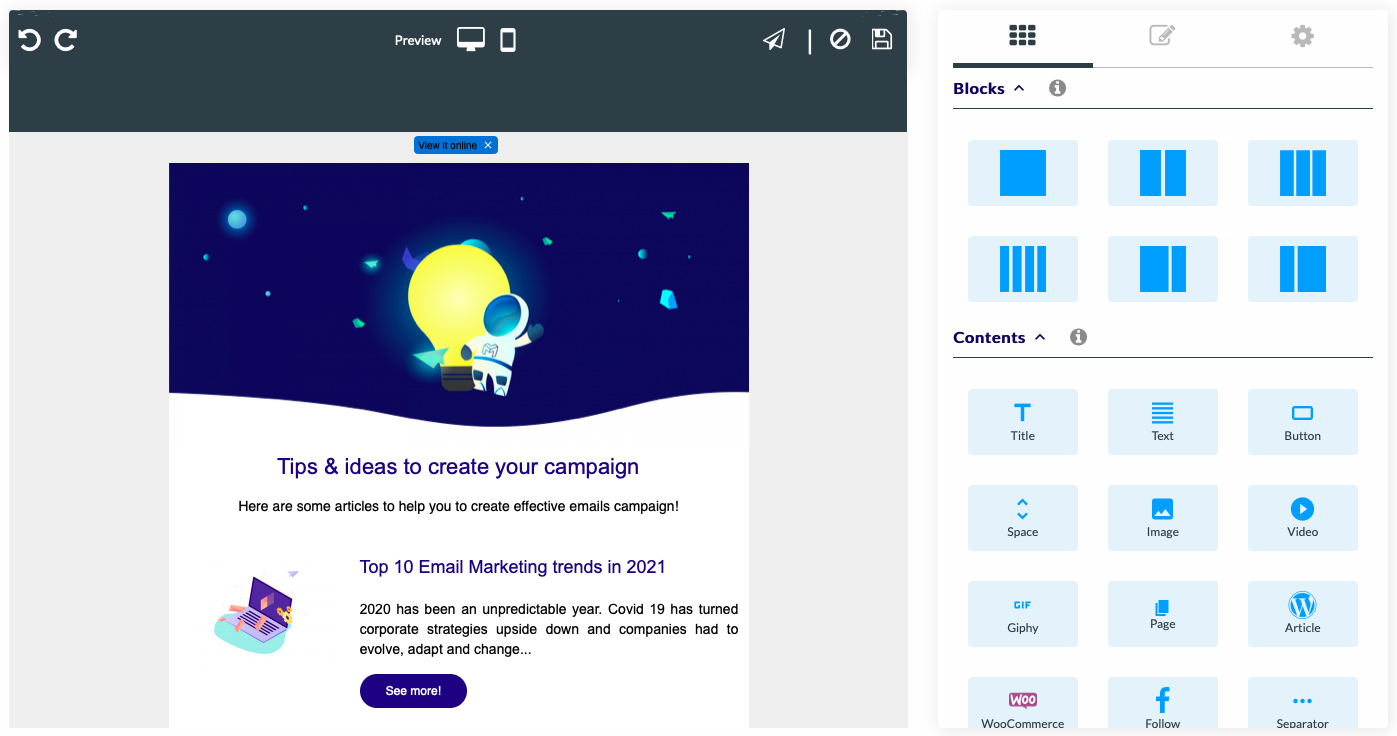
Click on “Edit email”. You are now in the AcyMailing editor. This tool allows you to edit your content and design your newsletters in a simple and intuitive way thanks to the Drag and Drop.
In the editor, you can:
- Create blocks and add columns
- Add text, images and videos
- Insert buttons (e.g. sign up)
- Integrate dynamic content and articles…
You can customise the design of your emails as you wish. You can see below an example of what your newsletter could look like.
When you have finished editing your newsletter content, save it by clicking on the “Save” icon on the top right.
3. Create a multilingual newsletter
Once you have written your newsletter in your own language, you can choose to translate it into another language. If you have subscribers from different countries, having several versions of your newsletter in different languages can be useful. To create a multilingual newsletter, you need to download Polylang. This plugin, which integrates easily with AcyMailing, allows you to translate your emails, posts and more.
4. Test and send your newsletter
Your newsletter is ready to be sent. Before sending it, test it to see if it will send correctly. To do this, click on the “Send a test” envelope and choose an email address.
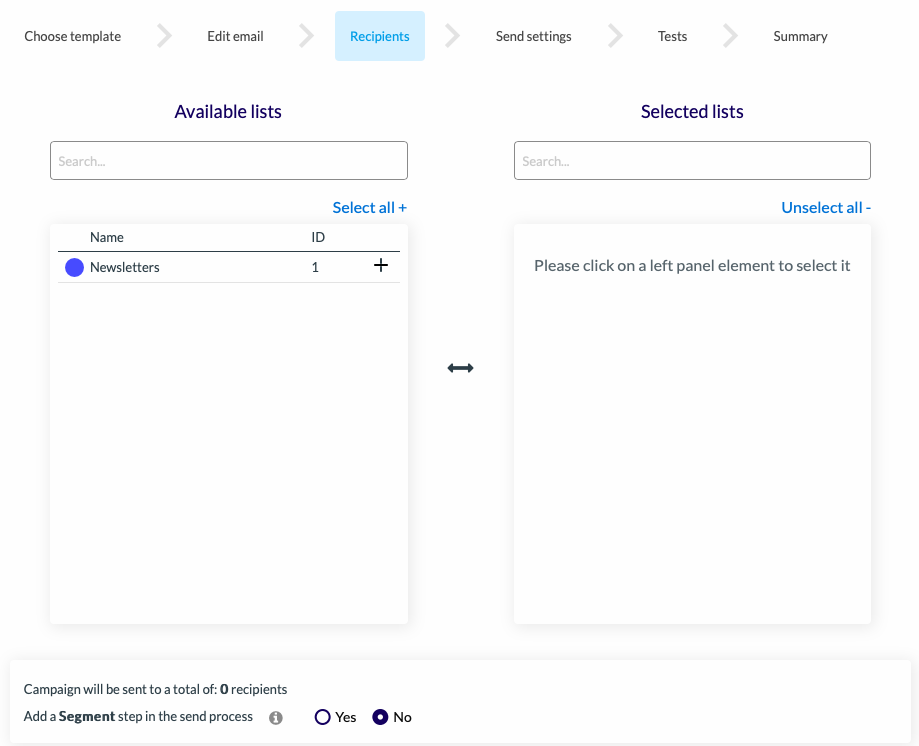
If you are happy with your newsletter, you can choose the list of subscribers (“Newsletter”) you want and send your email.
Finally, all you have to do is configure the sending parameters and test your campaign using our anti-spam test.
Your newsletter is ready to be sent.
Now you know everything about how to create a newsletter on WordPress.

