Email marketing automation is a powerful tool for businesses to communicate with their customers and promote their products or services. However, manually sending out emails to a large list of subscribers can be time-consuming and inefficient. That’s where automation comes in. In this article, we will explore how to automate your email marketing automation campaigns with AcyMailing.
AcyMailing is a email marketing tool that allows you to create and automate email campaigns. It is available as a plugin for both WordPress and Joomla, making it a versatile option for businesses of all sizes. AcyMailing offers a range of features to help you streamline your email marketing automation efforts, including mass actions, triggers, conditions, and actions.
⚙️ Understanding Automation – Two kinds of automation
Automation is a powerful feature that enables you to do actions on a selection of AcyMailing users. There are two kinds of automation: mass actions and triggers. Mass actions are one or several actions you can trigger directly on some specific targets. Marketing Automation are mass actions that are triggered automatically on specific frequency or users actions. The strength of this feature is the integration with other plugins like Woocommerce for WordPress or Hikashop for Joomla and many more.
To get started with AcyMailing, you will need to install the plugin on your website. Once installed, you can access the automation features by clicking on the “Automation” tab in the AcyMailing menu. The first time you open the listing of the automation, you should see two automations. These are “administrator notifications,” which are not totally like the automation but they’re close to it.
📋 Listing – Manage your automation easily

The listing is an important section where you can view and manage your automations. This section plays a vital role in automating your tasks and making your work more efficient. The “Active” column is an essential feature that allows you to control the behavior of your automation.
By clicking on this toggle, you can activate or deactivate your automation, which means that it will start or stop performing the set of actions based on the triggers.
For instance, suppose you activate the first administrator notification. In that case, you will receive an email every time a user is created, which can be useful in keeping track of the user activities. This feature is just one of the many benefits of using this automation tool.
Moreover, at the top right corner of the listing, you can see two buttons: “New mass action” and “New automation”. These buttons provide you with an opportunity to create new automations or mass actions, which can help you further streamline your workflow and make your work more productive. By creating new automations, you can automate more tasks, saving you time and effort, and allowing you to focus on more critical aspects of your work. On the other hand, the mass action feature enables you to perform actions on multiple objects at once, which can be a game-changer, especially when dealing with a high volume of data.
ℹ️ Information – Edit details
The “Information” tab is where you will fill in the name of the automation and add a description if you want to describe your automation for the next admin who will edit it to explain what this one does.

Once you’ve filled in this information, you need to set at least one trigger to continue. To do it, you simply have to drag and drop the trigger you want on the right zone.
Note that for the trigger “Every week on” and “On the“, you can set the time in the configuration of AcyMailing in the tab “Queue process” and at the bottom “Automated tasks.”
🎯 Triggers – Choose your action
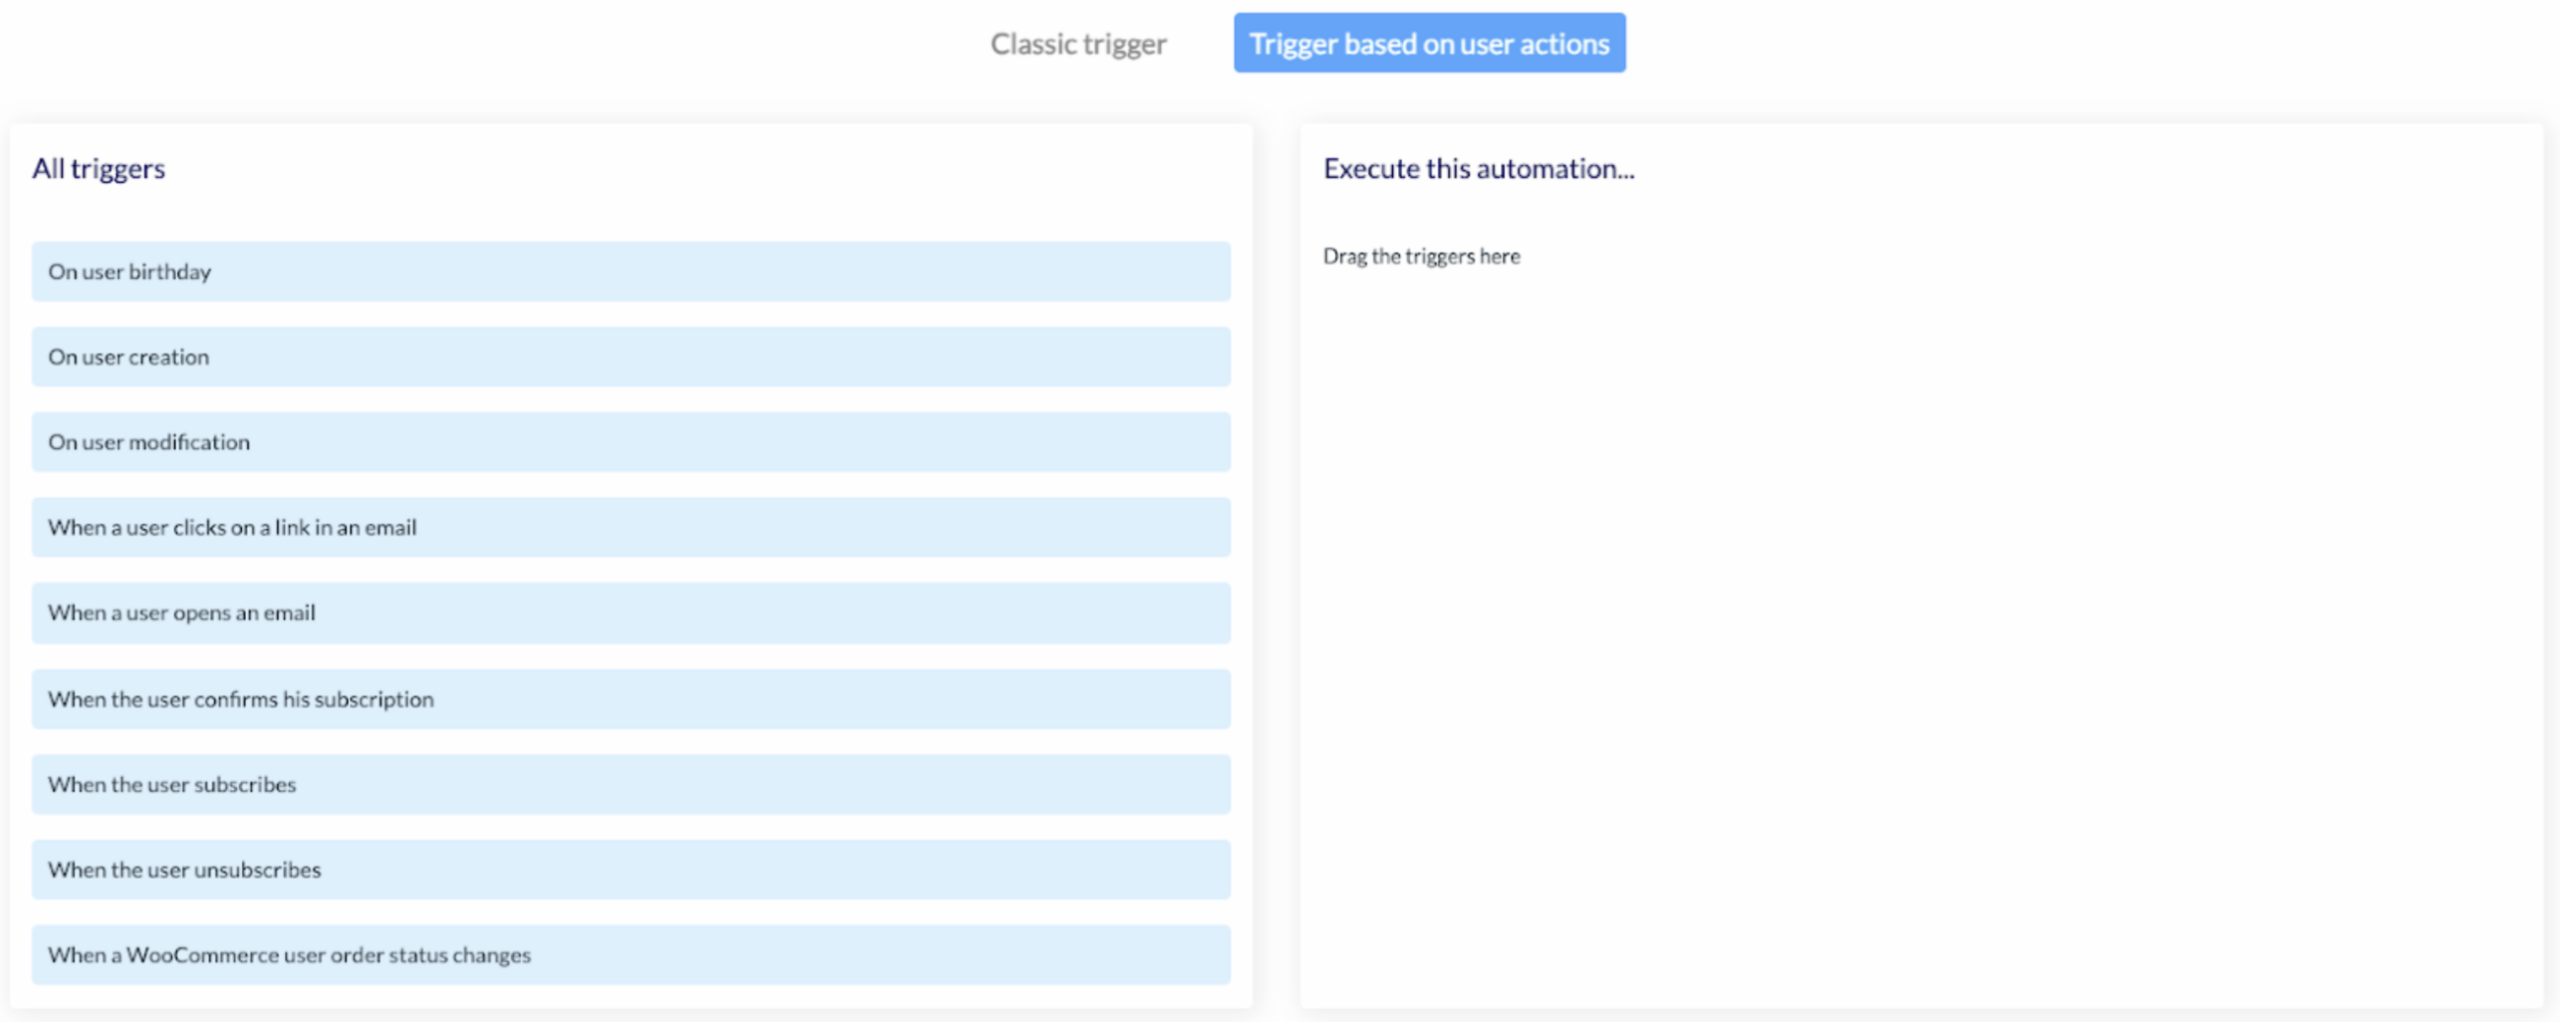
There are two types of triggers: classic triggers and triggers based on user actions.
Classic triggers include:

- “Each time AcyMailing is triggered”: This means that every time the cron is executed, the automation will be triggered.
- “Every day at”: This means that the automation will be triggered every day at the time you have set.
- “Every week on”: This means that the automation will be triggered every week on the day you have set.
- “On the”: This allows you to trigger the automation on every day of the month that you have chosen.
- “Every”: This means that the automation will be triggered with the recurrence you have set.
Triggers based on user actions include:

- “On user birthday”: This means that each time the current date reaches the value of an AcyMailing date custom field type, the automation will be triggered.
- “On user creation”: This means that each time a user is created, the automation will be triggered.
- “On user modification”: This means that each time a user is modified, the automation will be triggered.
- “When a user clicks on a link in an email”: This means that each time a user clicks on a link, the automation will be triggered. You can specify the email or trigger it on every email.
- “When a user opens a mail”: This means that each time a user opens an email, the automation will be triggered. You can specify the email or trigger it on every email.
- “When the user subscribes”: This means that each time a user is subscribed to one or several lists, the automation will be triggered.
- “When the user unsubscribes”: This means that each time a user unsubscribes from one or several lists, the automation will be triggered.
- “When the user confirms his subscription”: This means that each time a user confirms his subscription, the automation will be triggered.
- “When a WooCommerce user order status changes”: This means that each time a WooCommerce order changes status (you can specify old and new status), the automation will be triggered. This is only on WordPress, with both the WooCommerce plugin and our integration plugin installed.
🥇 Conditions – Perform your automation

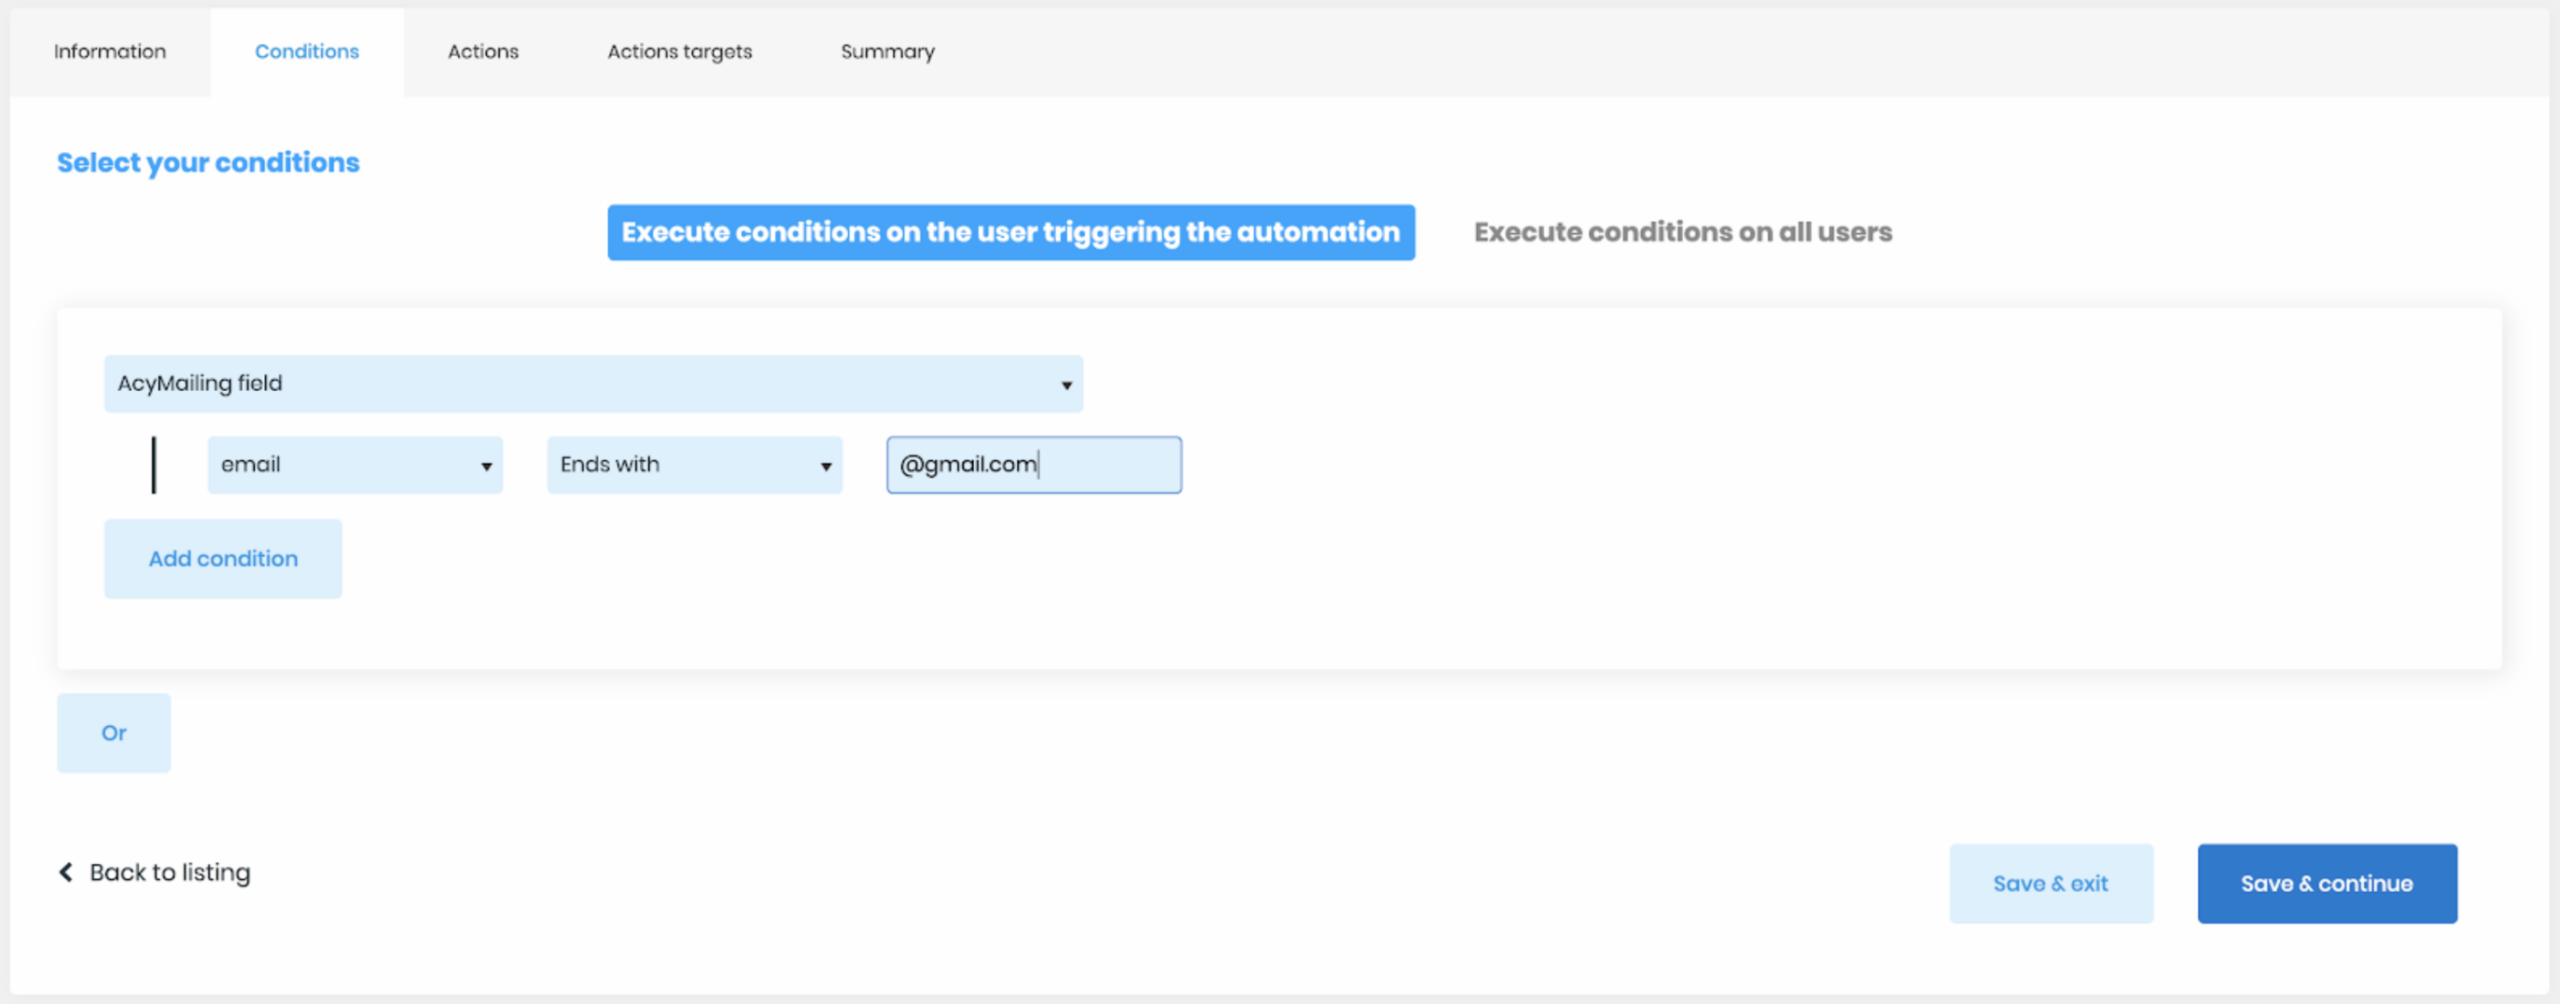
The “Conditions” tab is an essential feature where you can create conditions to be met before the automation is executed. This allows for a more tailored and personalized automation process. The step of verifying the conditions will depend on the triggers that were set earlier.
dIf you have selected a classic trigger, the conditions will be executed on all AcyMailing users. However, if you have chosen a trigger base on user action, the conditions can be executed on the user who triggered the automation or all users. For instance, if the trigger is a user clicking on a particular link, the condition can be set to check if the user has clicked on that link before.
Setting conditions helps in ensuring that the automation is executed efficiently. For instance, if you have set a condition that the user should have made a previous purchase, the automation will only be executed on users who have made a purchase before.
The “Conditions” tab is a crucial aspect of automation that allows for a more customized and efficient process.
🎬 Actions : Select what you want to do

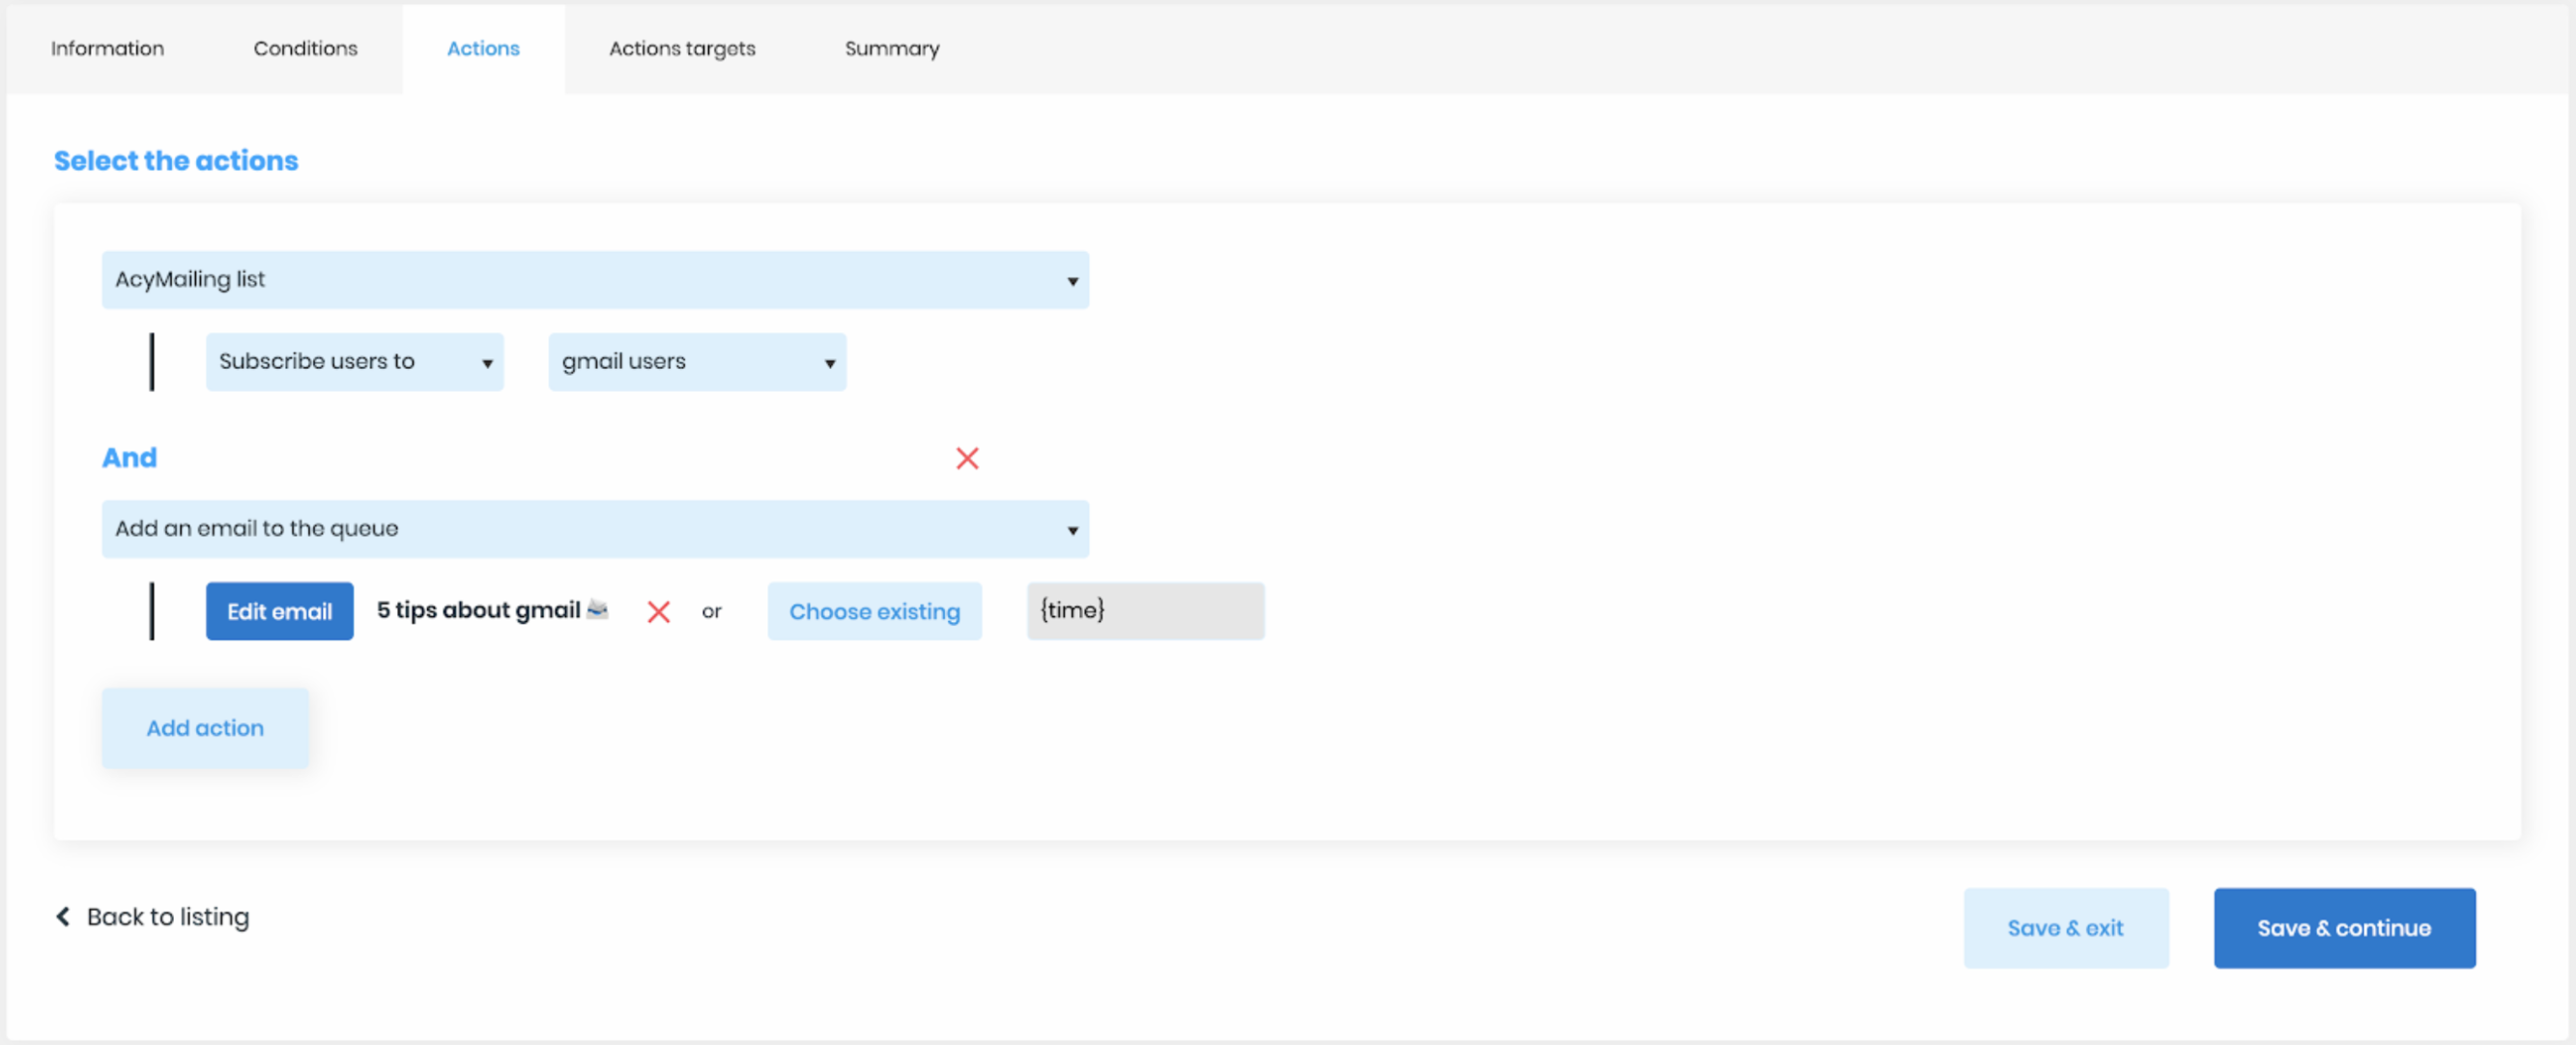
The actions tab is undeniably one of the most interesting parts of AcyMailing automations. Here, you can execute a variety of actions on your AcyMailing users.
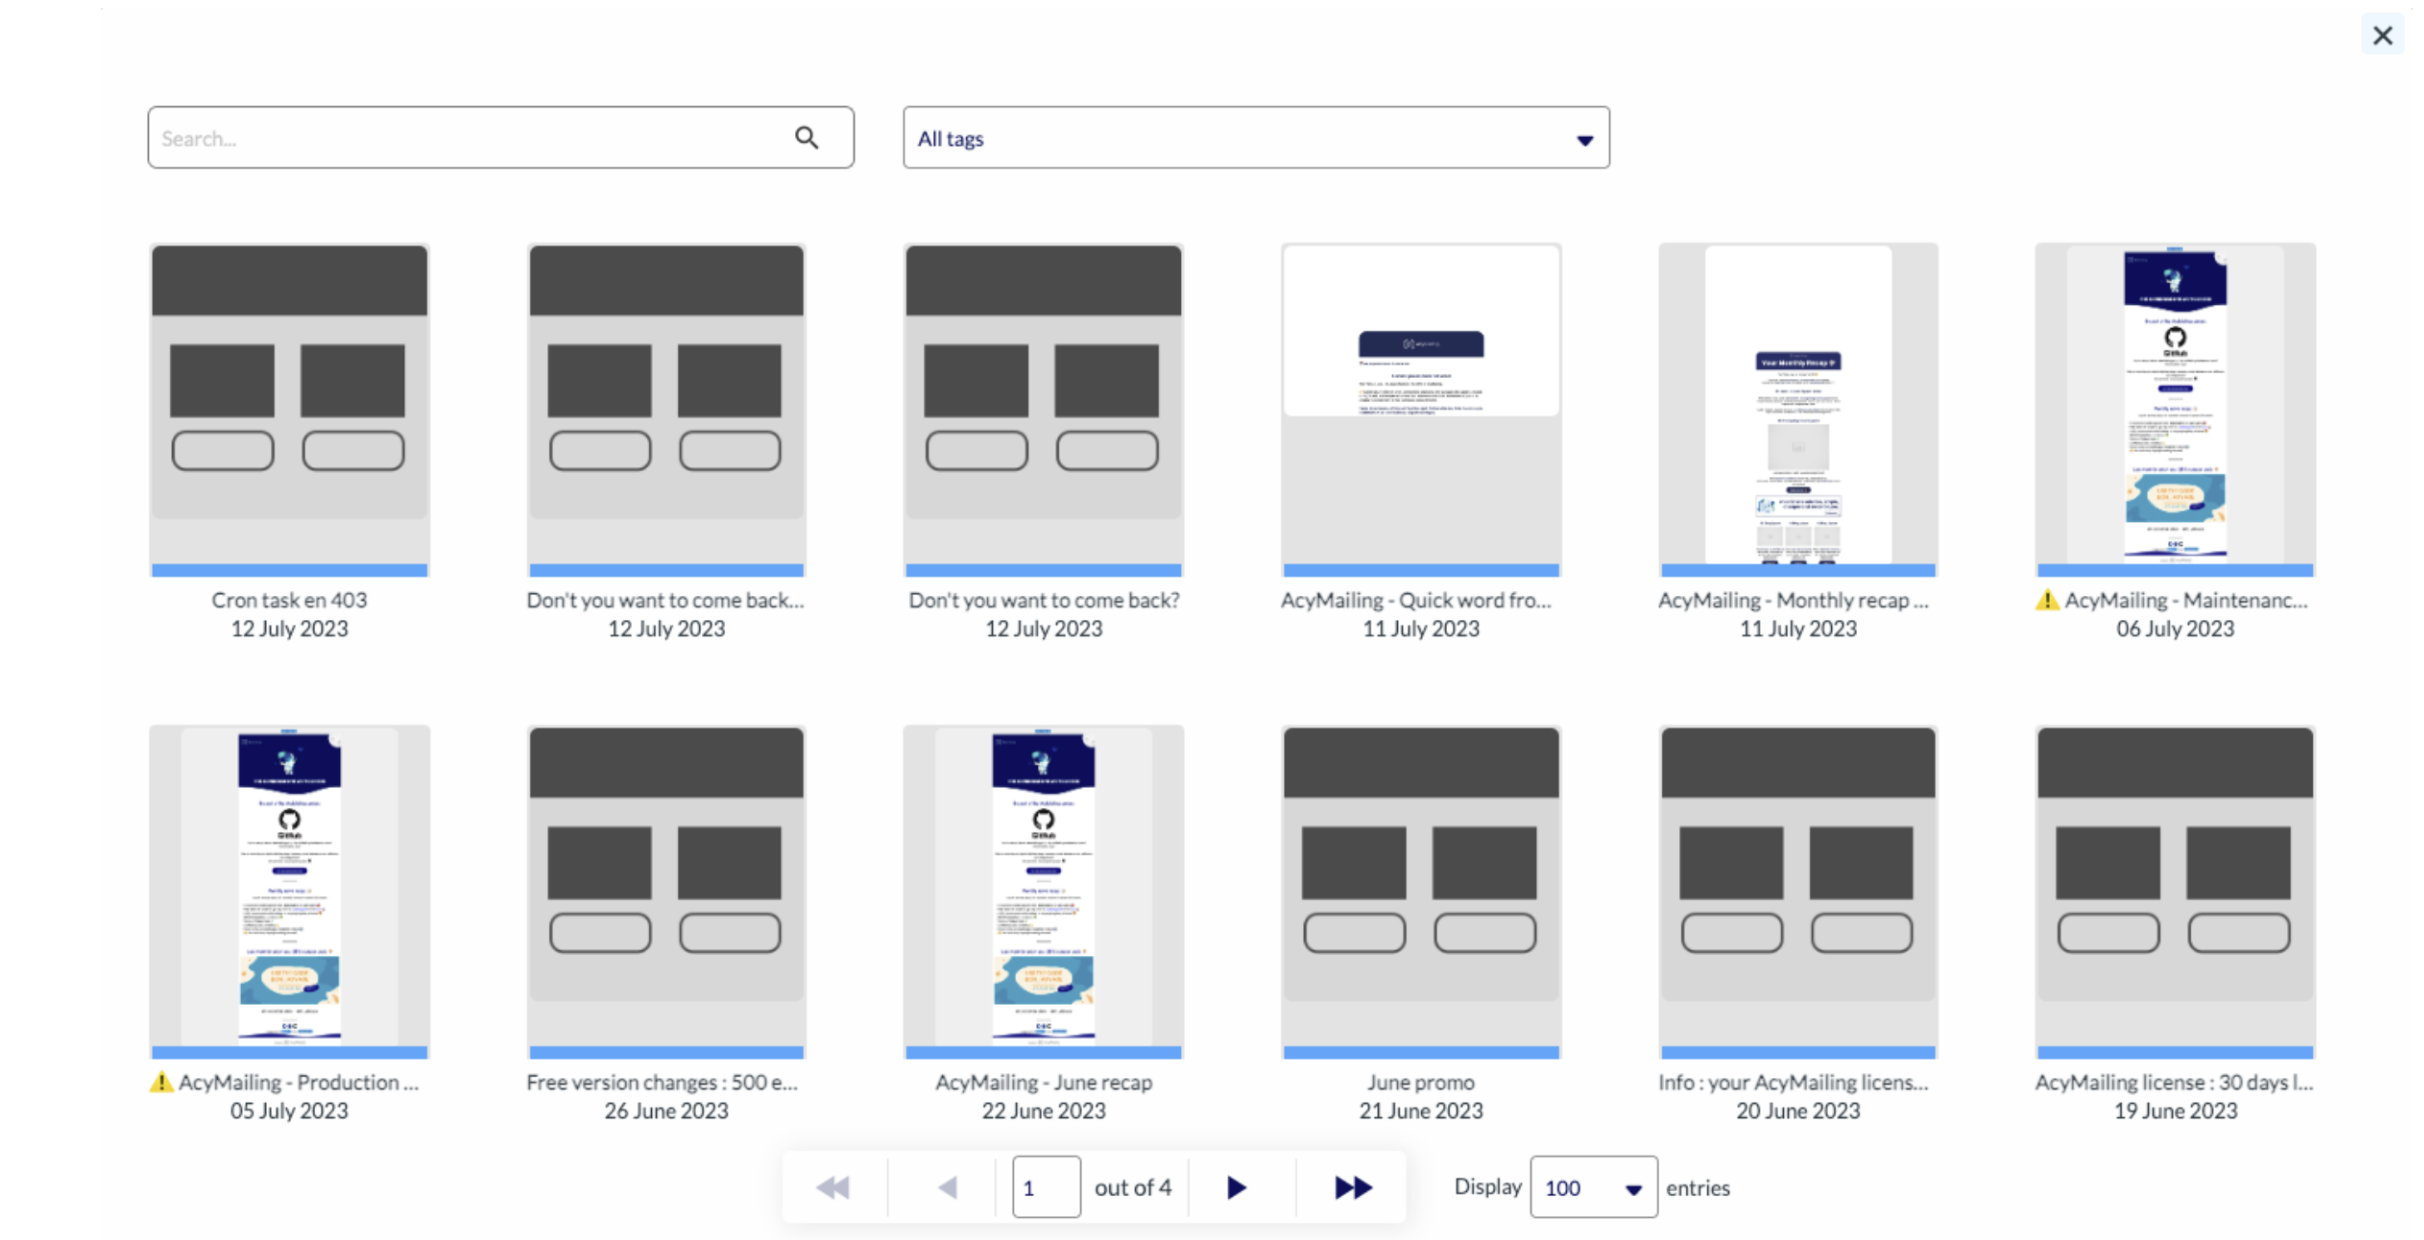
You could subscribe a user to the Gmail users list, and then send them an email. If you choose to add an email to the queue, you will have the option to either create a new email or use an existing one. In the latter case, you will need to click on the “choose existing” button, which will cause a popup to appear. 
In addition to setting the email’s content, you can also specify exactly when you want it to be sent.
For example, you could choose to send the email at a dynamic date that is two hours after the trigger, or at a specific date and time. Note that when you use the “[time]” placeholder, AcyMailing will replace it with the current time at the moment the automation is triggered. If you leave it as is, the email will be sent immediately
It is important to note that when you select an email template by clicking on the “choose existing” button, AcyMailing will create a new email based on that template, rather than simply linking to the original template.
💰 Action targets – applied your actions
The “Actions Targets” tab allows you to choose who the actions will be apply on. As for the conditions, this step will change according to the trigger you’ve chosen. If you chose a classic trigger, then you can execute actions on all users or just a part depending on the filters you’ve chosen. If you’ve chosen a trigger based on a user action, you’ll be able to execute actions for all users and just the one who triggered the automation.
The actions targets feature in AcyMailing allows you to choose the specific users on whom you want the actions to be apply. This step may vary depending on the trigger you’ve chosen.
yFor instance, if you’ve opted for a classic trigger, you can execute actions on all users or a specific subset, depending on the filters you’ve set. On the other hand, if you’ve chosen a trigger based on a user actionou’ll be able to execute actions for all users and specifically for the one who triggered the automation.

If you choose to execute the actions on the user triggering the automation.

It is important to note that if you wish to execute your actions on all your users, you can simply save the automation without setting any filters. This way, AcyMailing will execute the automation on all users in your database.
Should you be interested in seeing the list of users that match the current condition, simply click on the See users button, and a modal will appear showing all the users that meet the criteria.
also read : How to create a newsletter on WordPress


