All your need to know about creating your Contact Form 7 newsletters??
You want to keep in touch with your users and send them news about your activity, new products or events? A good marketing strategy will start by giving your WordPress users the possibility to subscribe to your newsletters.
There are several ways to let your users subscribe, such as the use of the AcyMailing subscription widget and other available forms. You can also use form plugins to get subscriptions such as Contact Form 7 or Gravity Forms. We will focus here on how to create a form With Contact Form 7 which displays your AcyMailing lists.
WHAT IS CONTACT FORM 7?
Contact Form 7 is a WordPress plugin allowing you to create and manage forms on your website.
You can not only manage multiple contact forms and customize them but also configure the mail contents that will be sent on form validation flexibly with simple markup.
The form supports Ajax-powered submitting, CAPTCHA, Akismet spam filtering and so on.
You can find more information on how to start with Contact Form 7 thanks to their documentation.
SUBSCRIBE A NEWSLETTER LIST FROM YOUR FORM USING ACYMAILING
We will work on the basis you have already installed the Contact Form 7 plugin on your website.
Step 1: Install the newsletter plugin for Contact Form 7
If you want the users filling your contact form to be subscribed to a newsletter system then AcyMailing is the plugin you need!
You will need to install an extra plugin allowing you to set AcyMailing lists in your forms.
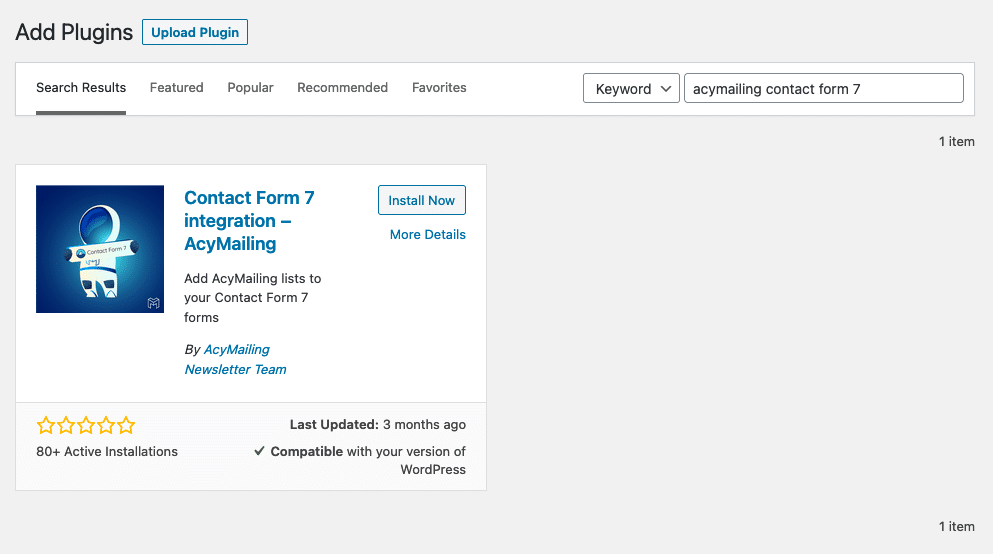
You can go in the plugin section of your site to add a new one and look for our integration plugins with the words “AcyMailing Contact Form 7”.
Then install and activate the plugin.
Step 2: Create the newsletter lists you want to display on your form
If you want your users to be able to subscribe to AcyMailing, then you will have to display them one or more lists. This way, they can select which kind of communication they would like to receive from you.
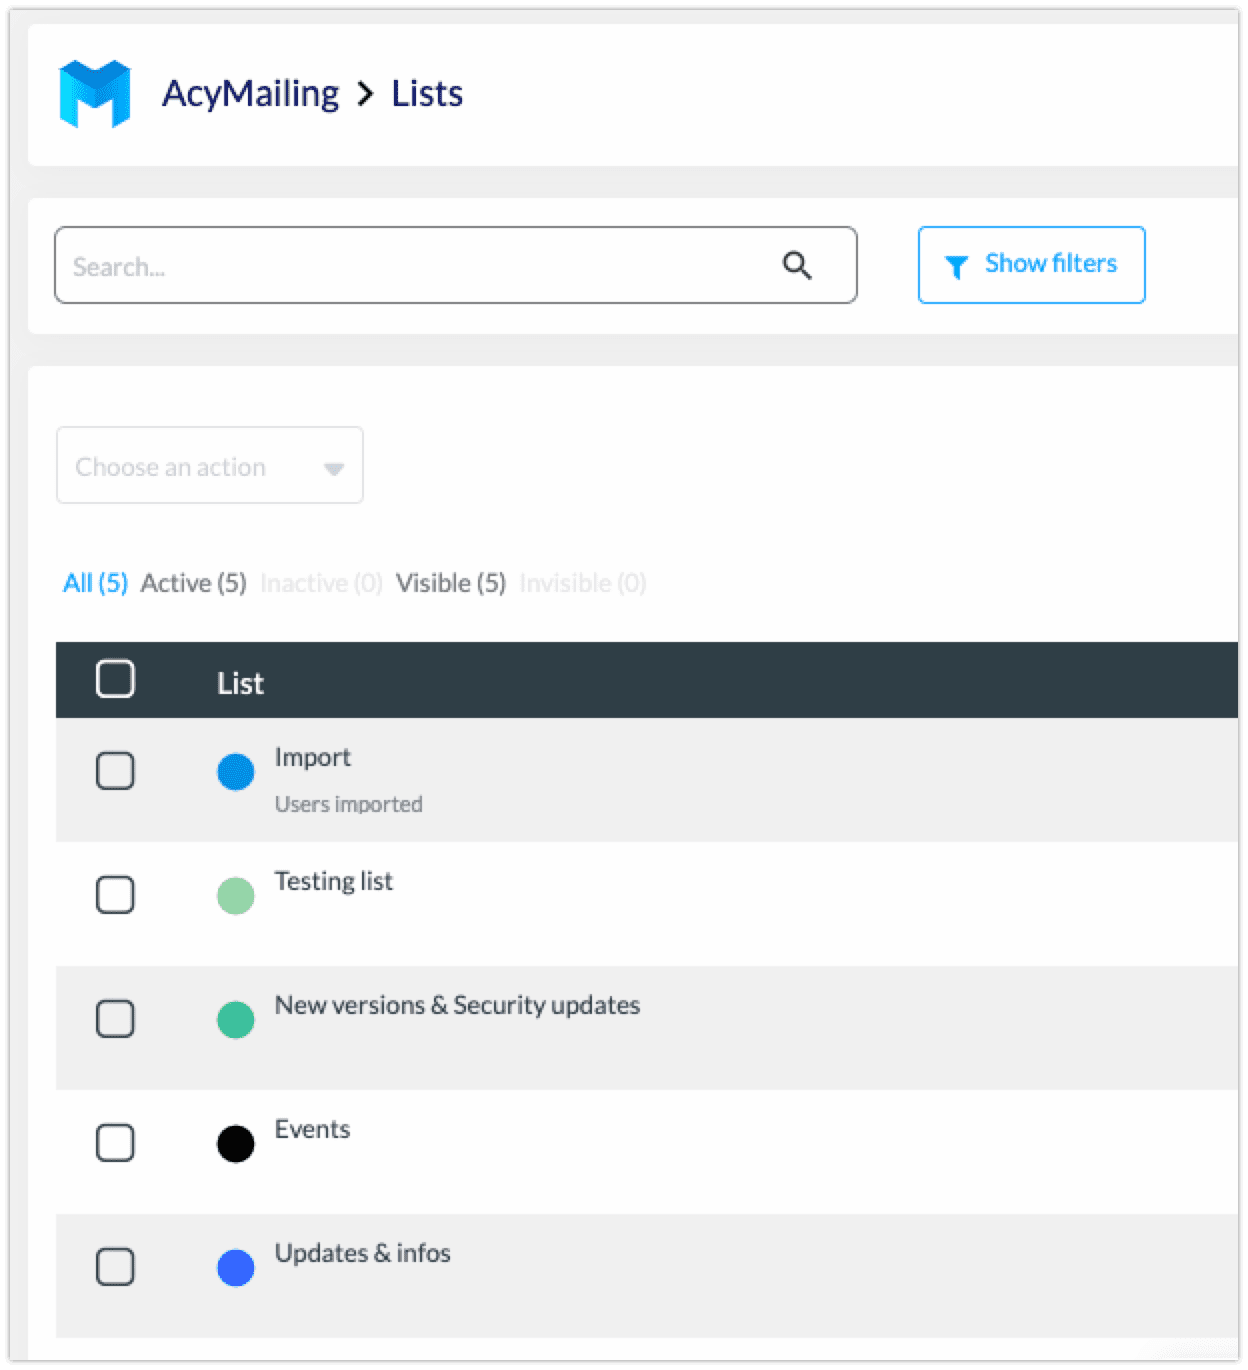
Go in AcyMailing, and make sure you have some lists available. If needed, you can create new ones specific for the users who will subscribe through Contact Form 7.
Step 3: Configure your contact form
Now that all preparations have been made, you can finally edit your form. In Contact Form 7, create or edit a form to add you AcyMailing information.
Contact Form 7 allows you to easily add elements to your form by clicking on buttons and setting the parameters you want.
Thanks to the integration plugin you have previously installed, a new option is available to add AcyMailing lists to your form.
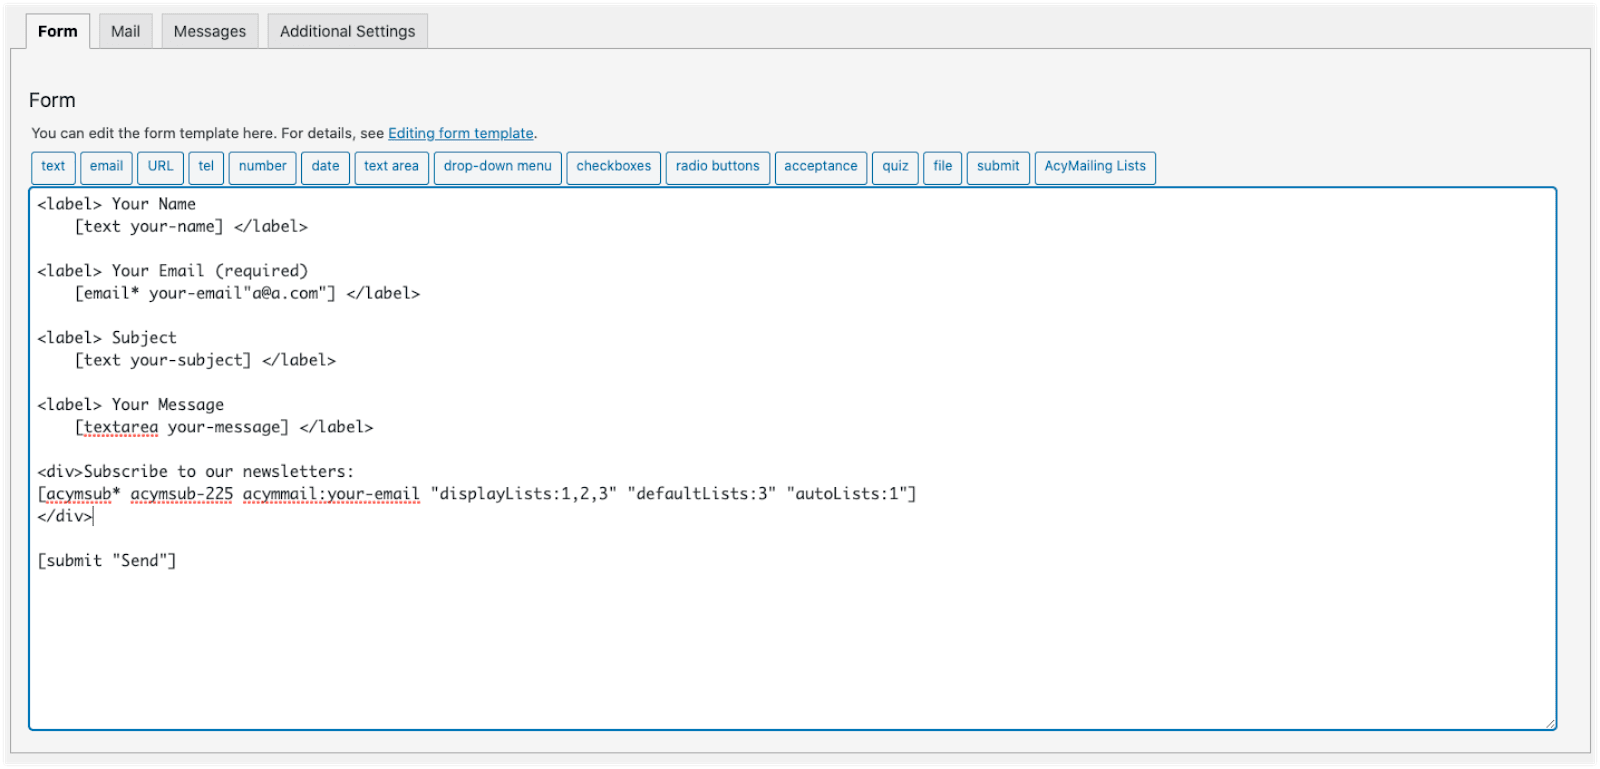
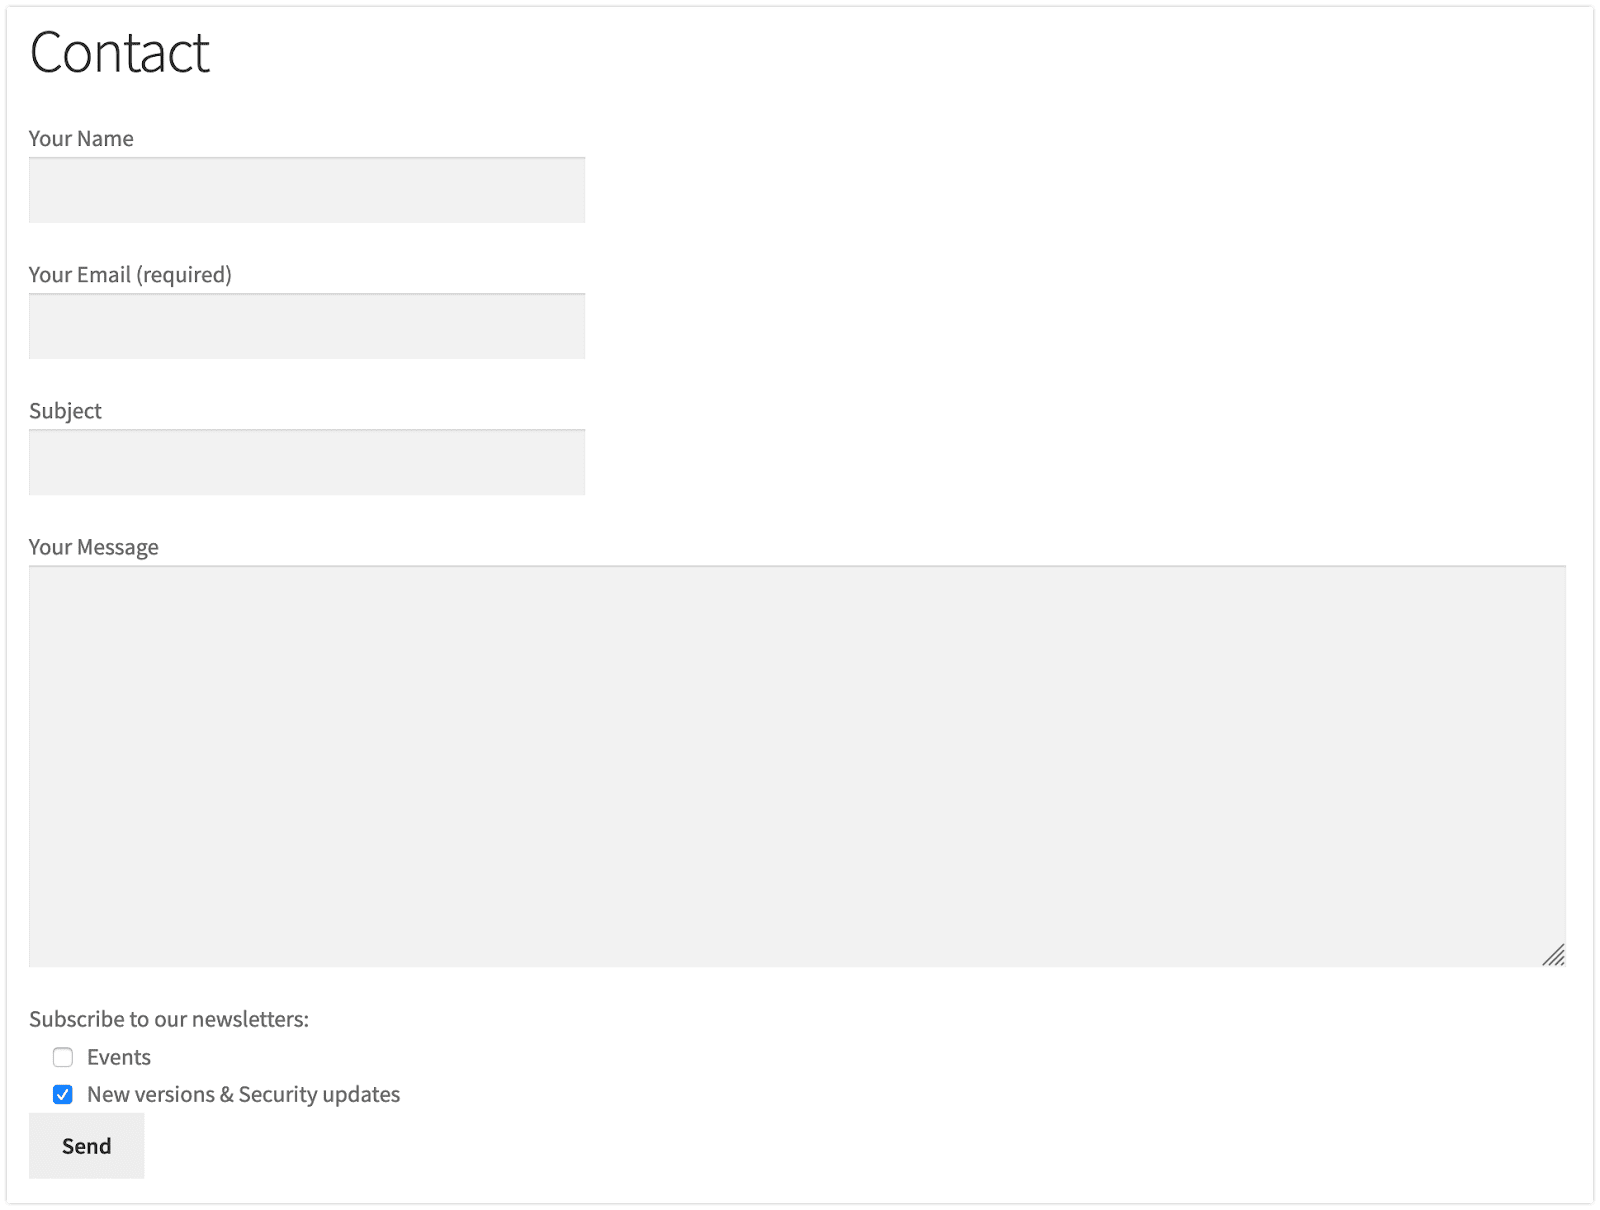
Click in the editor, where you want to add the AcyMailing lists and add the HTML structure if some tags are needed for you to customize the style. You can write some text which will be displayed along with the choice of lists. You can set for example: “Subscribe to our newsletters”.
Then click on the “AcyMailing lists” button to be able to add the lists.
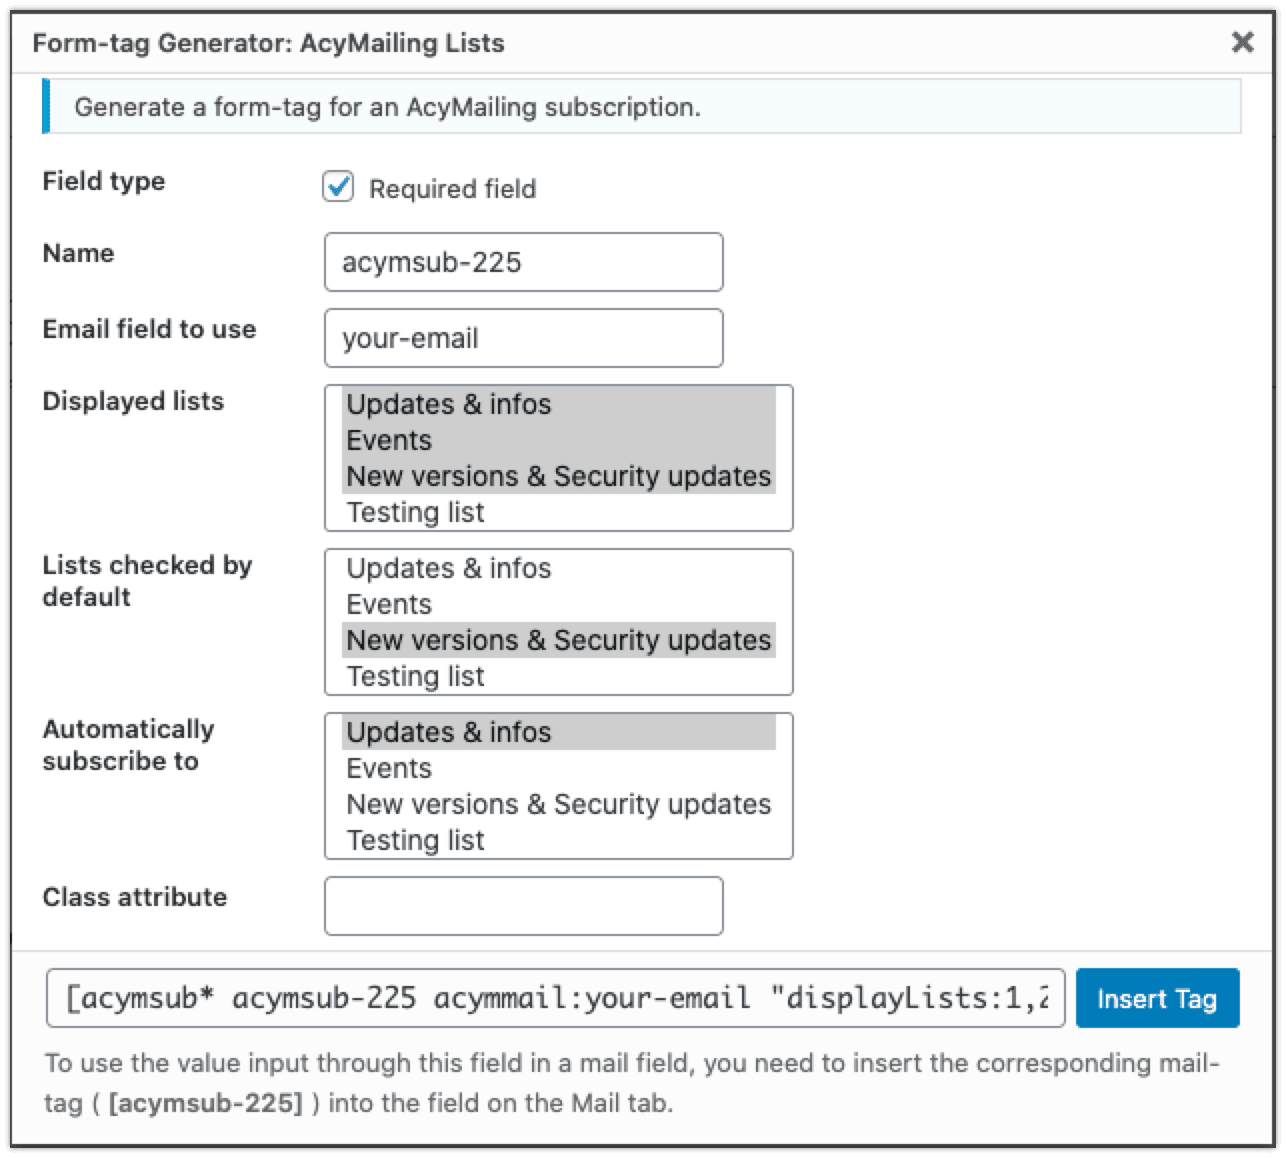
It will open a small window where you will find the default configuration fields when adding content in Contact Form 7 and some specific to AcyMailing.
- Field type: choose if the user must choose at least one list to be able to submit the form.
- Name: name of your field to be able to select it later in the mail sent when the form is submitted
- Email field to use: you must have an email field in your form and put here its name so Acymailing can subscribe the user
- Displayed lists: select which lists the user can see on the form
- Lists checked by default: select which lists are selected by default when the form is displayed
- Automatically subscribe to: select to which lists the user will be automatically subscribed to when submitting the form. These lists won’t be displayed on the form.
- Class attribute: you can set a CSS class that will be added on the form if you want to set some specific style to the AcyMailing lists displayed
Once configured, you can insert the created tag.
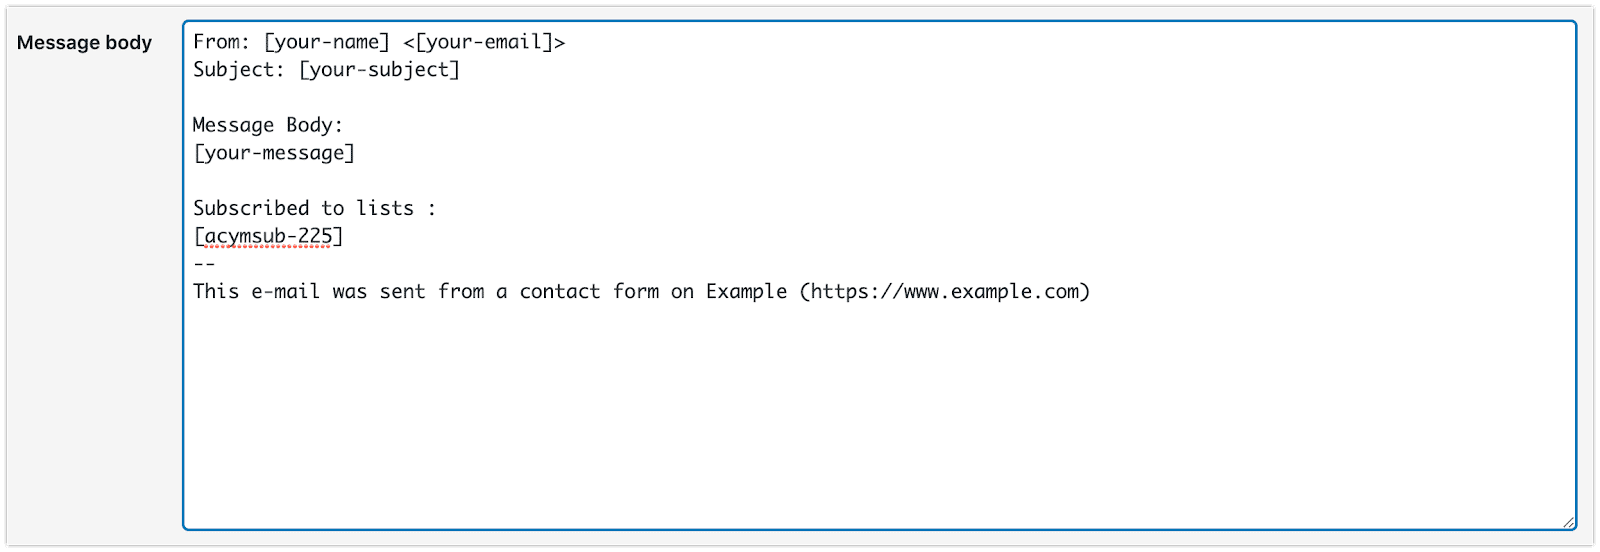
Once the form is ready, you can also add the lists the user selected in the mail sent on form validation by adding the name of the lists field.
Step 4: Test the subscription
You can now go see you form on the site and try to submit it to subscribe to your AcyMailing lists.
You can find here our documentation on the integration between AcyMailing and Contact Form 7.
That’s all for today!
We hope you had a great time reading this article and that it was useful for you!

