A welcome email is an email received by a prospect after signing up for one of your mailing lists on your website. The welcome email allows users to learn more about the brand. This is the first email your customer will receive from your company. Therefore, it is important to pay attention to this first step.
Let’s walk through your WordPress welcome emails in this article.
Why are welcome emails important?
Welcome emails are very important. They are sent at a time when your subscribers are most receptive to your communication. Subscribers have taken the first step by signing up for your newsletter, now it’s your turn. Subscribers will expect to receive a welcome email from you. Personalize it to make it effective and memorable. Experian reports that the welcome email has a 57% open rate. Welcome emails are also 7 times more likely to be clicked on than promotional e-mails. That’s why we shouldn’t ignore it.
An effective welcome email will make your subscribers want to learn more about your company, but will also direct them to take a first action: to get information, to buy, or to get a confirmation of their registration. These e-mails will also help to improve your chances of getting your future communications opened. A good introduction will keep readers interested and encourage them to read more. It’s the same here. Get your subscribers’ attention from the start and convert them into customers.
What are the different types of welcome emails?
There are different types of welcome emails, depending on your strategy. Here are a few ways you can structure your welcome email:
- The basic welcome email
A welcome email is a great way to welcome new subscribers to your company. Usually, this type of email is very basic. You’ll find the famed welcome, a simple text and a call to action that refers your subscribers to your brand’s website. You can personalize your welcome email to encourage visitors to click on your website. Originality is key. Stand out from the inbox. Choose a catchphrase that will capture the attention of your target audience. Make the e-mail more personal by including your contact’s first name.
- The “Thank You” email
The “Thank You” email is a good way to welcome your users. Spam and invasive emails are making Internet users increasingly wary of sharing their e-mail addresses. A “thank you” from a company where you have just subscribed is always appreciated. Even though this email is automated, it shows the brand’s interest in its users.
- The showcase email
The showcase email is one of the most used emails by brands. You can showcase your company’s products and services. You can use it to convey your brand values and promote your business. Make sure you attract the attention of your prospects if you want to stand out from your competitors. Create a pitch-like experience for your readers using visuals, impactful keywords, original wording… Think creatively.
- Getting started email
A new product is not always easy to use for customers. Learn how to use your products from the beginning instead of overwhelming your customer service. The welcome email is a way to help new users get the most out of your products. The email explains the steps to follow after they sign up. Therefore, it should be simple and concise.
- Promotional email
Create a welcome email that encourages users to make their first purchase. You can generate sales or convert prospects by sending a welcome email with promotional offers. Different types of promotions can be included in your email:
- Coupon codes
- Discounts
- Special offers
You’ve probably seen it before: “Thanks for signing up, we’re offering 10% off your first order. Offer valid for 48 hours.
Your products can be easily integrated into emails if you have a WooCommerce site. Your prospects will be more likely to purchase if you offer them a discount, and they’ll also find your offers easier to view on your WordPress site. E-commerce site owners commonly use this form of email.
- The How-To email
This email is a real user guide. The How-To email is a good way to quickly teach your prospects how to use your products or services. What better way to encourage your target to buy than by showing the potential of a product in real life. Choose media that allows for quick and intuitive understanding, such as videos, GIFs, or illustrations for this type of email. Including a CTA to a completed article is also an option. They will become experts quickly.
What is the best way to create a welcome email on WordPress?
You can use a newsletter plugin to create a welcome email on WordPress. AcyMailing is a WordPress plugin for creating, managing, and sending newsletters. Let’s see how to create a welcome email with the AcyMailing plugin for WordPress.
Step 1: Install and configure AcyMailing
Go to your WordPress site’s admin area to download AcyMailing.
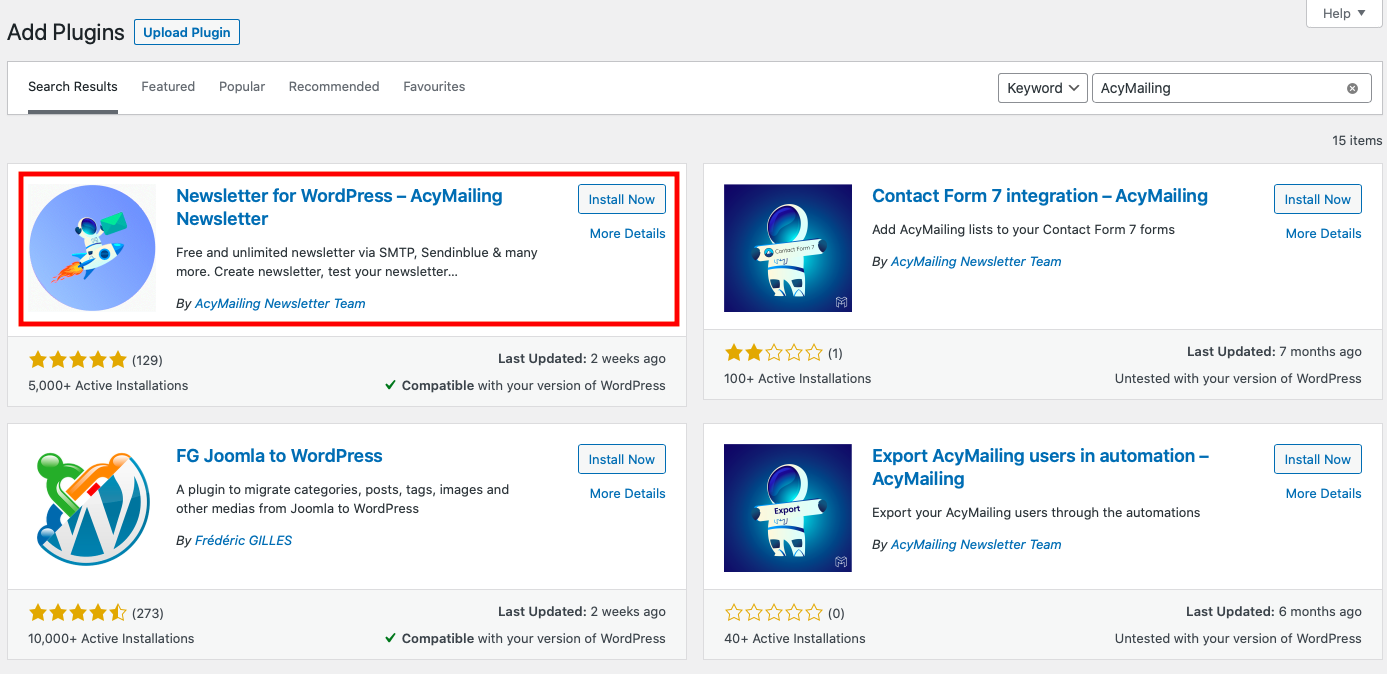
You can add a new plugin in WordPress’ “Plugins” section. Search for AcyMailing in the search bar. The plugin can then be installed and activated.
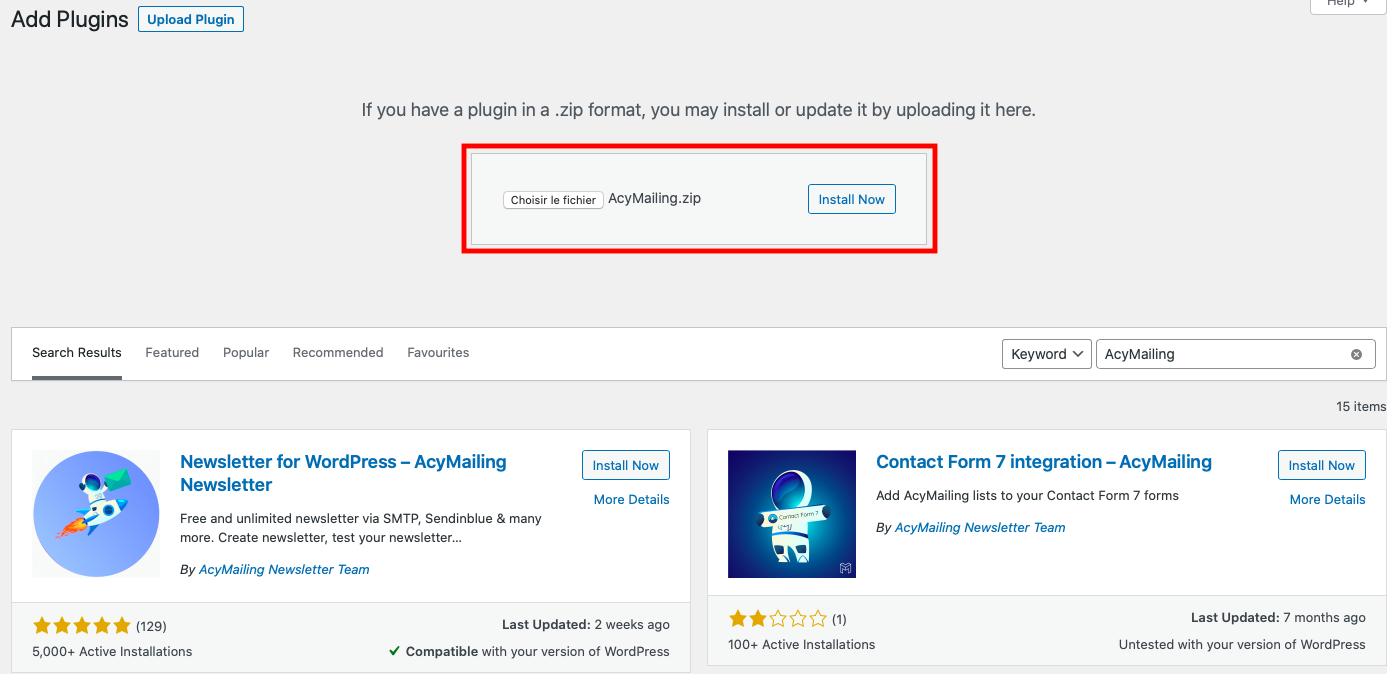
If you have a paid version, you can upload it by clicking on “Upload plugin”. Then drag your ZIP file into the dedicated space and click on “Install” and “Activate”.
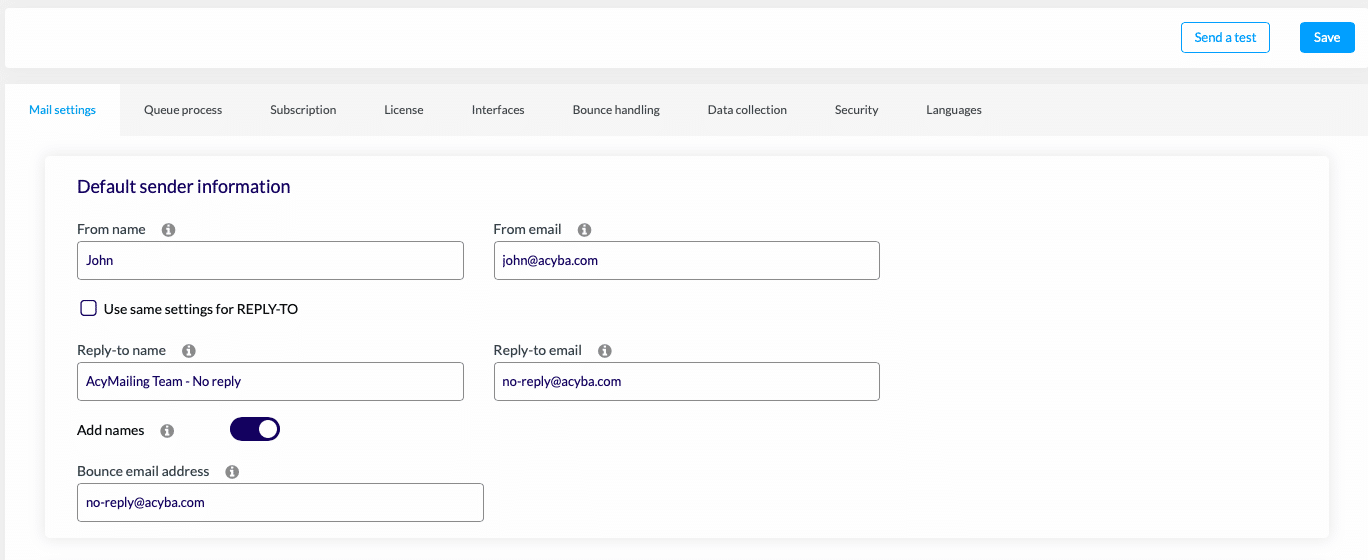
AcyMailing can now be configured. You can receive and send welcome emails with this configuration. Go to the “Configuration” menu.
First, you will have to configure the recipient’s information:
- Sender’s name
- Sender’s email
- Bounce address
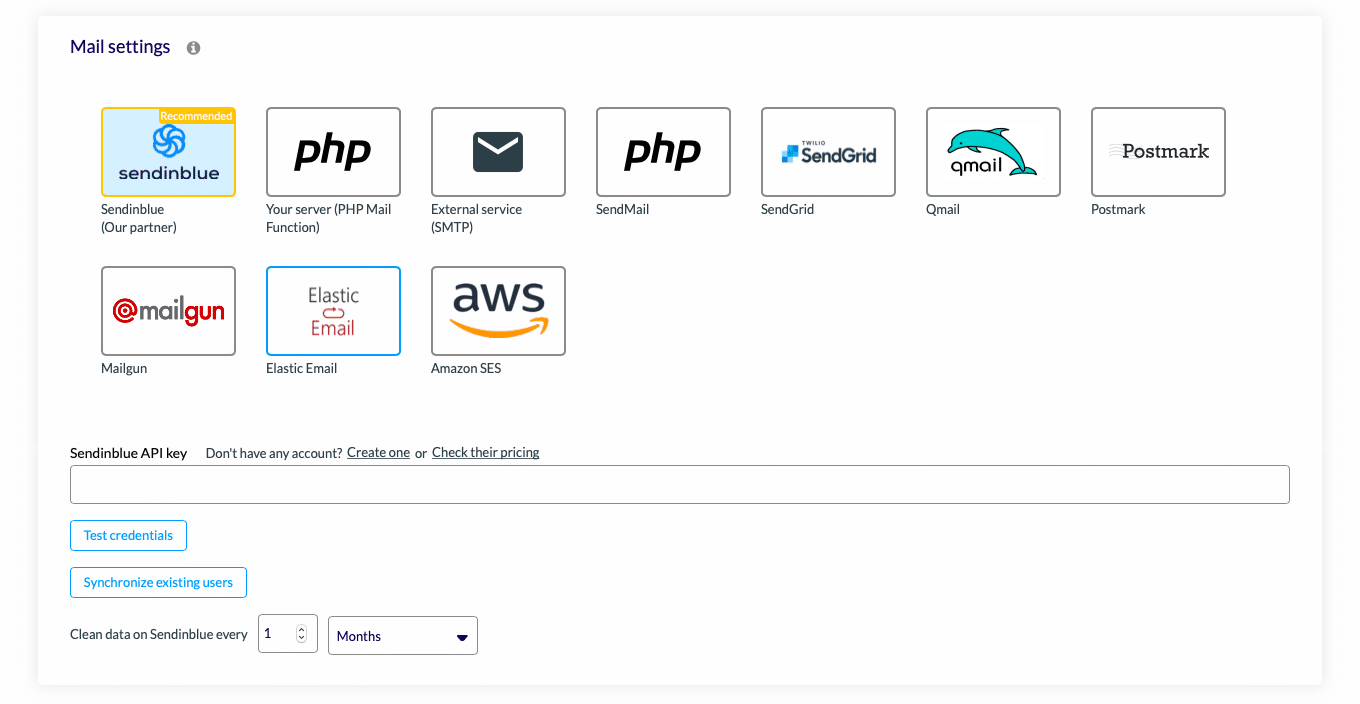
Then, in “Mail settings”, you can configure your sending method. You can choose between different methods: Amazon SES, Sendinblue, Mailgun, SMTP…
To learn more about setting up AcyMailing, check out our complete guide: How to use our AcyMailing newsletter plugin on WordPress.
Step 2: Create a list
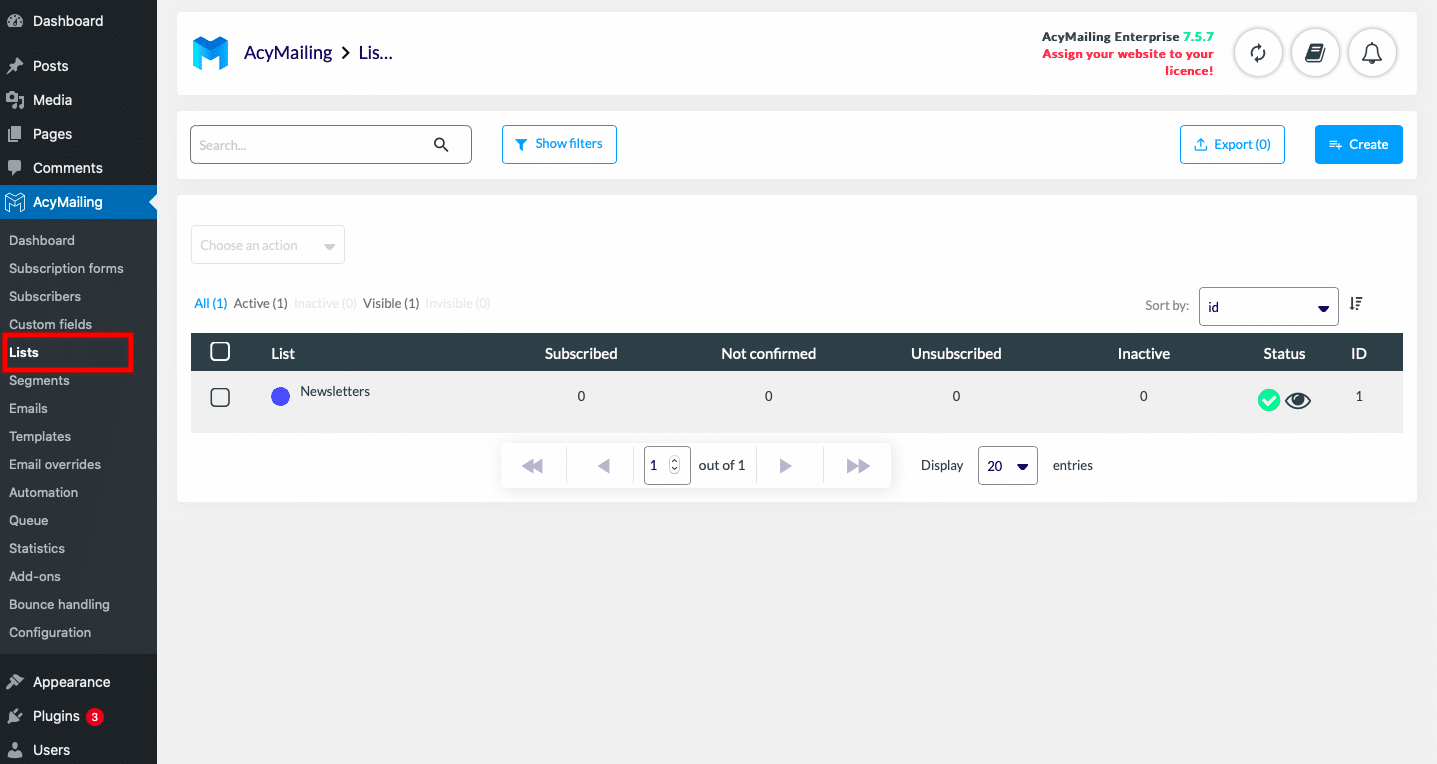
You need to create a mailing list before creating your welcome email. Your subscribers will be able to sign up for this list and receive a welcome email. A welcome email can be created per list. Create a new list in the “Lists” section (click on “Create”) or select an existing one.
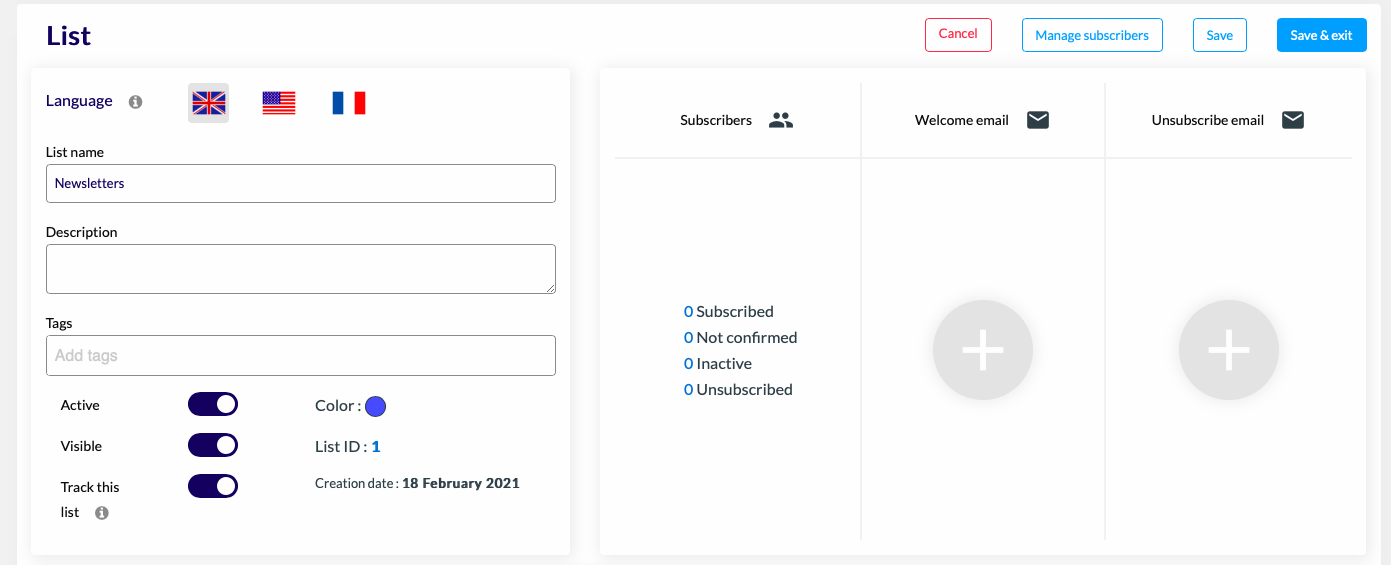
Once in your list, you will be able to fill in information about your list (name, description, tags…). You can add or remove subscribers to this list. Click on “manage my subscribers”. Then drag your subscribers into the new list. Once all your subscribers have been added, you can save and exit.
Subscribers who sign up for this list via your sign-up form will receive this welcome email. To learn more about subscription forms, see our article: How to create popups on WordPress.
Step 3: Create a welcome email
You can create a welcome email in two different ways:
- Via your lists
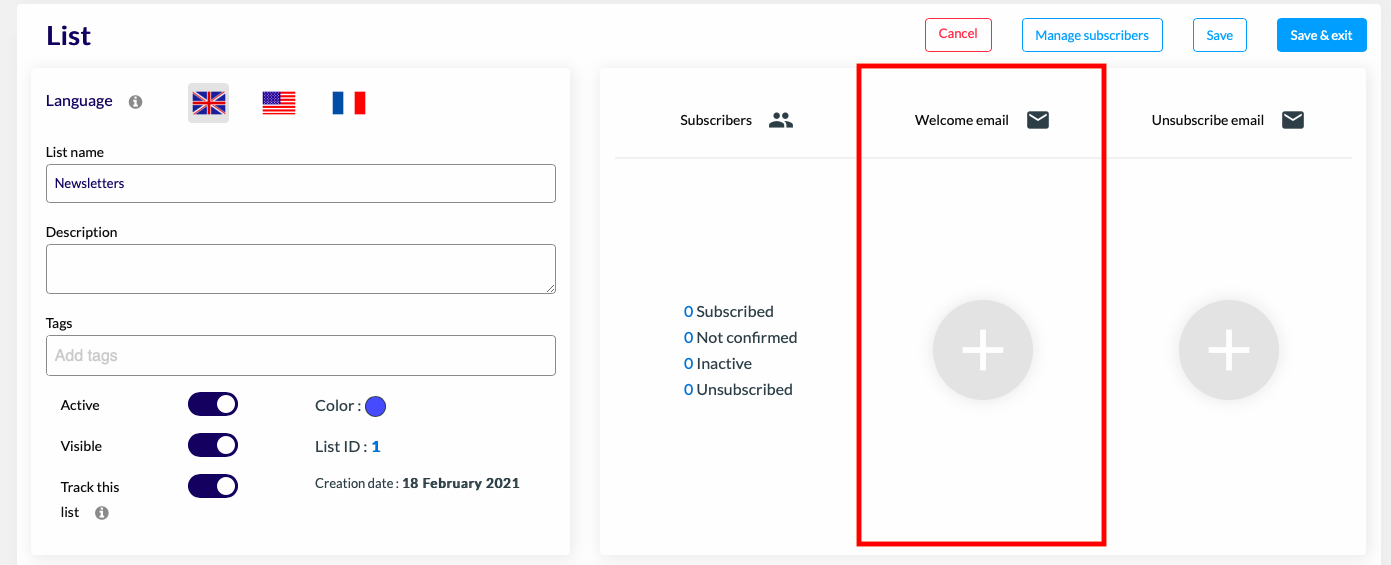
To create a welcome email in your lists, select one of your lists and click on the “+” in the “Welcome email” column.
- Via your emails
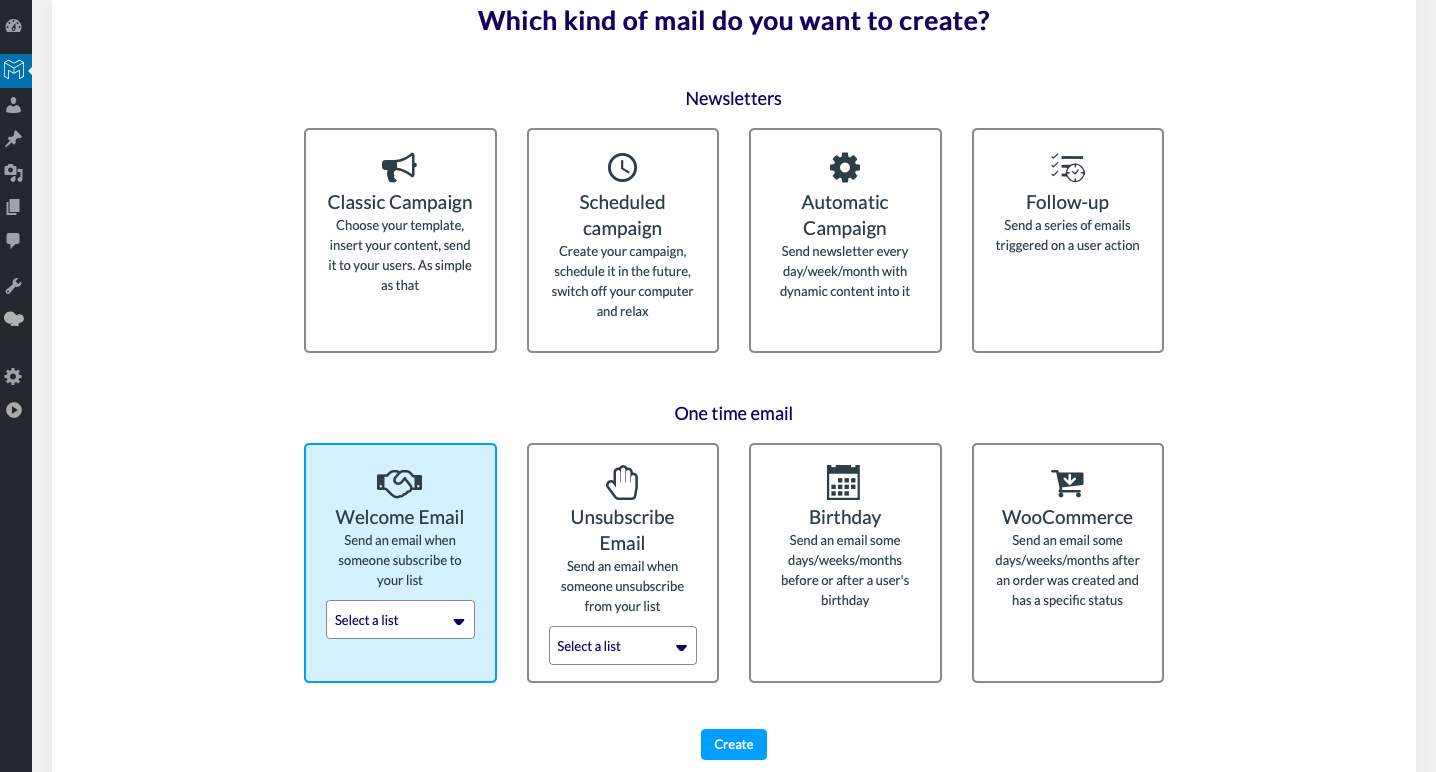
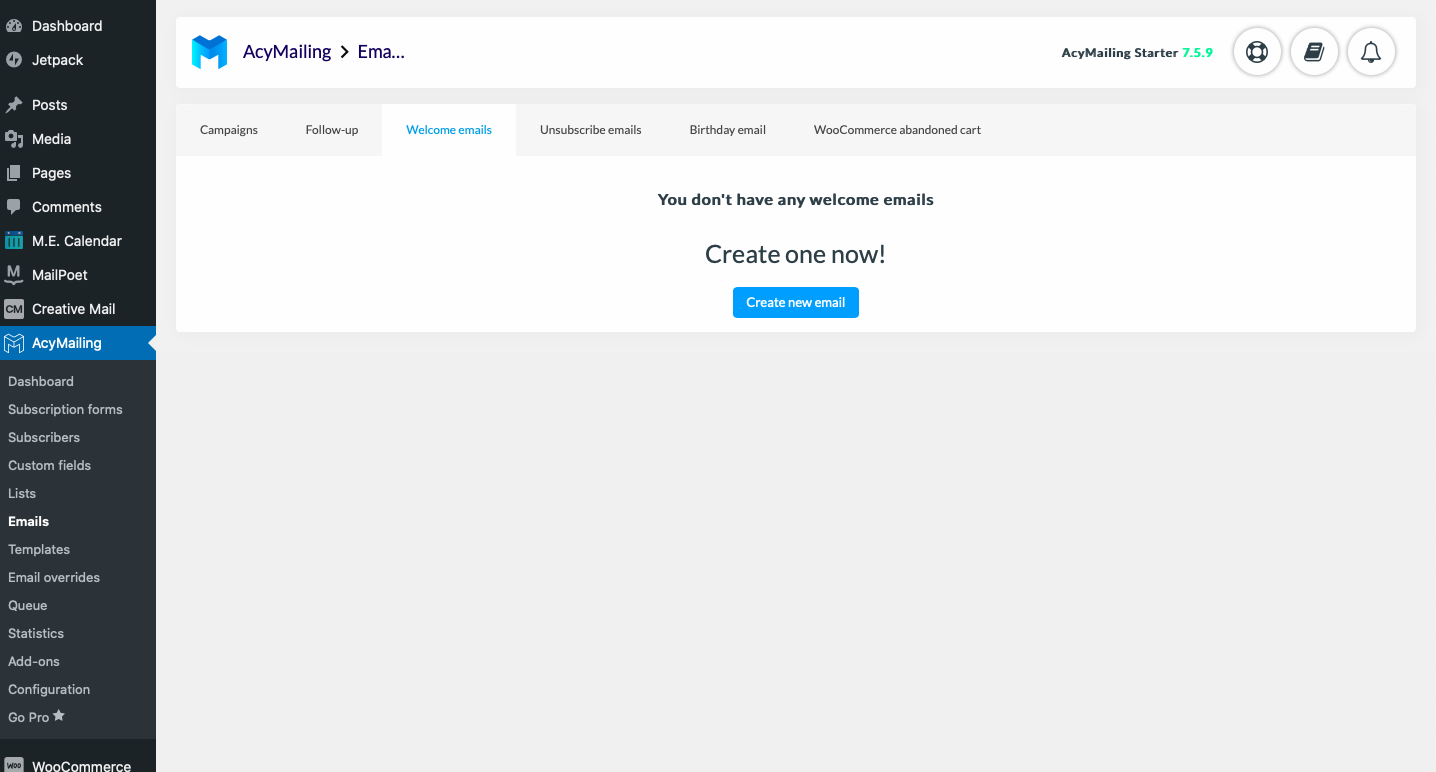
To create a welcome email when creating your e-mail, go to the “Emails” section. Then click on “Welcome emails” and “Create a new email”.
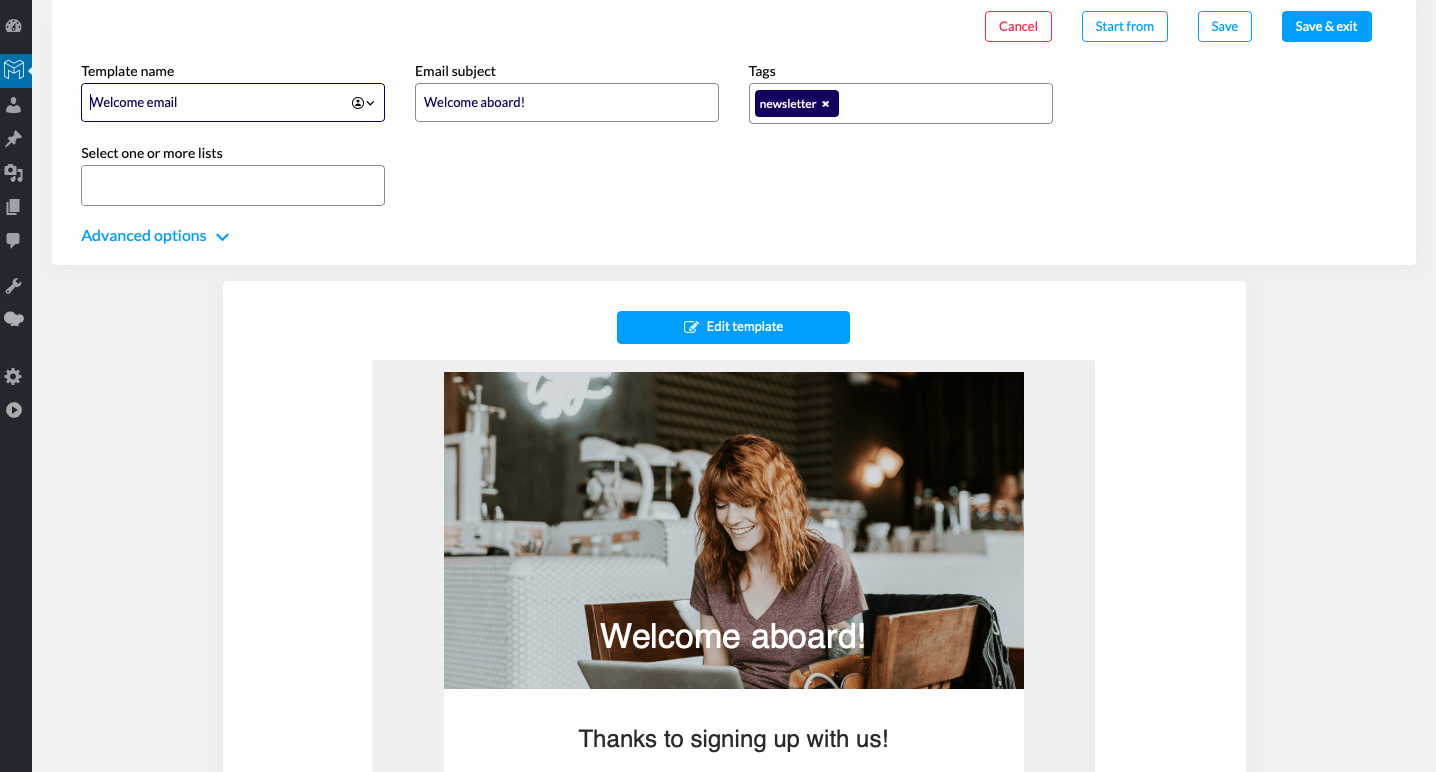
You will be redirected to the Templates. Welcome emails are automatically saved in your templates, so you can easily find them and reuse them.
You can then start filling in the information about your email:
- Template name
- Subject of the email
- Selection from the list
Save and then click on “Edit template”.
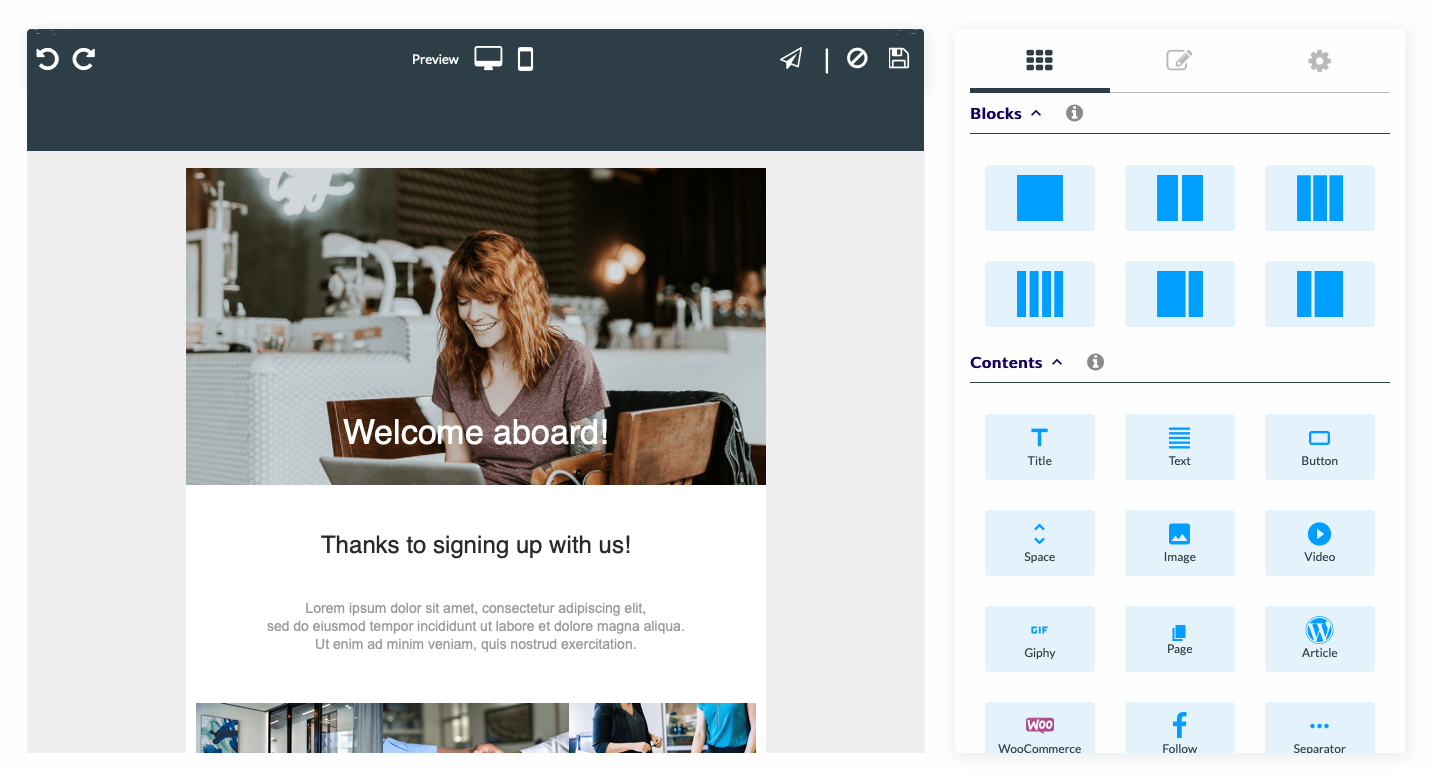
You can then edit your welcome email. Editing a welcome email is similar to editing a newsletter email. To add elements to your email, drag and drop the elements (blocks and content) into your email.
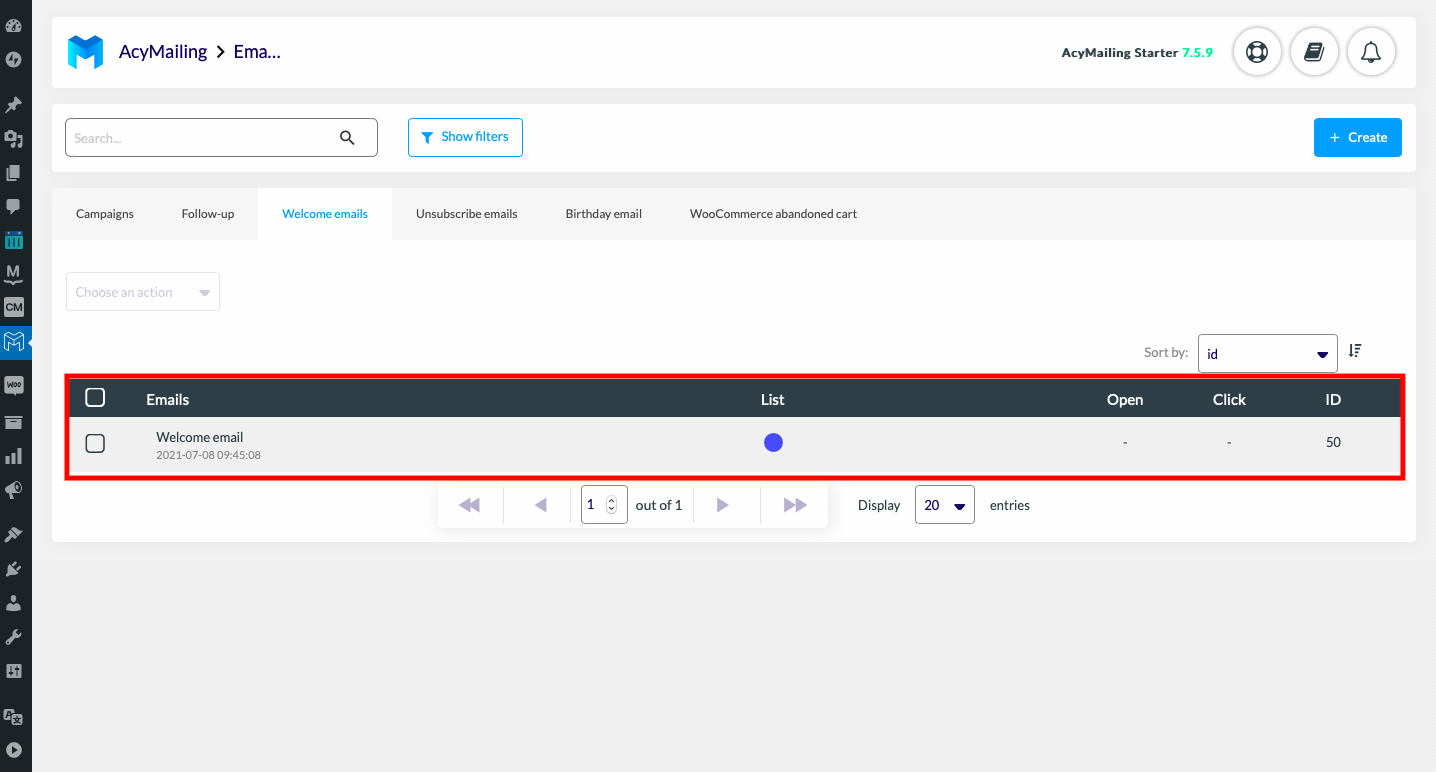
Save your changes by selecting “Save and Exit”. Your email has now been added to your welcome email list.
Check out our article: How to create a newsletter on WordPress to learn more about editing and sending newsletters.
Now you know everything about welcome emails. Which one would you choose?

